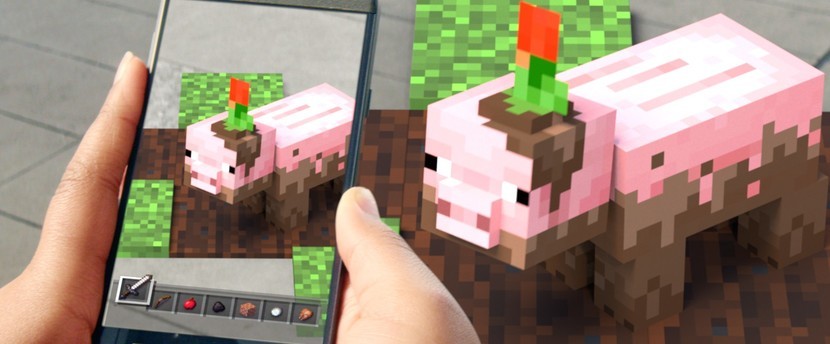
To sign up, you’ll also need a Microsoft or Xbox Live account and app store login. By signing up for the beta, you can get a free skin for Minecraft Earth and Minecraft Bedrock.
According to CNET sister site GameSpot, you can explore the Minecraft Earth world to find treasure chests, block clusters and mobs called “Toppables.” You can build permanent structures on Build Plates, and, by coming across an Adventure, you can also experience a full Minecraft overlay where you can collect resources and dispatch mobs.
Multiplayer capabilities are also expected in the future.
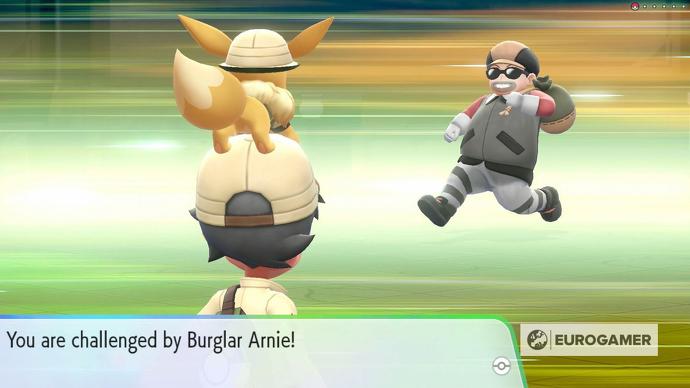
Pokémon Let’s Go Pikachu and Eevee bring some major changes to the traditional Pokémon experience, but they also shake up some of the little things on your return to the Kanto region of generation one, from what items are available and where, to the trainers you battle and the Pokémon that can be found along the way.
Here in our Pokémon Let’s Go walkthrough and guidehub, we assemble all our individual Let’s Go guides in one place for you to quickly flick through them, on top of our list of every page of our complete walkthrough to Pokémon Let’s Go, from Pallet Town to the Elite Four and beyond. Enjoy your adventure!
Pokémon Let’s Go walkthrough for Let’s Go Pikachu and Let’s Go Eevee
Each walkthrough page in our guide covers all the Pokémon, Items, and battles or Trainers that we’ve discovered on every route or location along the way.
Our walkthrough is now complete, but we’ll be doubling back and adding any additional finds along the way if we spot them. With that in mind, here’s our walkthrough of every location you’ll encounter in your quest, in order:
Pokémon Let’s Go walkthrough
Pokémon Let’s Go walkthrough part 1: the Boulder Badge
That’s the end of our now-complete walkthrough, but keep checking back for more standalone guides and explainers to the game’s systems and mechanics in the section just below!
In Days Gone Hordes are huge gatherings of zombie-like Freakers, sometimes hundreds strong – and are perhaps the most daunting thing to come across in the wilderness of post-apocalyptic Oregon.
However, slaying them earns you considerable Days Gone Horde rewards including trust, experience points and, if you can take every single horde out, the St. John Horde Killer Custom Skin for your motorcycle.
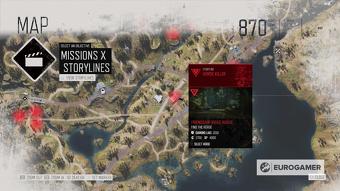
How Horde locations work and tips to beat Hordes in Days Gone
There are 40 different Freaker hordes spread across five of the game’s six regions. You’ll have to beat three of them during the main campaign, leaving the other 37 roaming the world.
Once the credits have rolled on the main story, every horde will be highlighted on the map.
Your best bet for tackling hordes is strategically planning out each attack. The individual Freakers inside a horde move with great speed towards Deacon, ripping him to pieces if they catch up with him.
Throwable explosives such as frag grenades and molotov cocktails combined with lots of running and machine gun fire is usually the best strategy for killing every individual Freaker in a given horde.
Additionally, Freaker Hordes vary in strength. The further down this list you go, the bigger the hordes tend to be with the Highway 97 region home to the largest and most dangerous hordes.
Cascade Wilderness Horde locations in Days Gone
Here’s where all the Cascade Wilderness Horde locations at a glance:
Locate the Old Pioneer Cemetery Nero Checkpoint at the north-eastern most point of the Cascade Wilderness map. From this checkpoint, head west until you come across a car park situated at the top of a hill. Follow the slope down the other side and you’ll come across the mouth of a cave. The horde emerges from these caves once night falls.
Cascade Wilderness Horde #2 Location (White King Mine Horde)
This horde roams an area at the northwest section of the Cascade Wilderness map, almost directly west from the Grotto Caves Horde and the Jefferson Rail Tunnel Ambush camp. At night the horde can be found in a dry river bed by a small bridge, in the day they sleep in the nearby cave.
Head to the Horse Lake Nero Checkpoint to find this horde. Inside the train carriages that sit abandoned on the tracks just north of the Nero Checkpoint you’ll be able to find a sleeping horde. During the night they wander over to the dig site just east from the NERO trailer.
Cascade Wilderness Horde #4 Location (Horse Lake Horde)
Head northeast on the road from the Horse Lake NERO Checkpoint until you come across a series of cave mouths on the left side of the tarmac. Look for the cave mouth that is adorned with branches and blood, venture inside to find the horde.
Locate the O’Leary Mountain Safehouse (it’s the same watchtower that Boozer stays in during the first few hours of the game) and head directly north, heading down the mountain track. The O’Leary Mountain Horde are living in a cave that cuts through the base of the mountain.
Cascade Wilderness Horde #6 Location (Little Bear Lake Horde)
Head to the Little Bear Lake Nero Checkpoint but, before you enter the camp, take the left turn onto the dirt track by the abandoned car and the speed limit sign. Follow this winding track downhill until you come across a wooden shack, during the day the horde hibernate in here.
From the Horse Creek Ambush Camp travel north until you pass underneath the steel railway bridge. This horde moves along the lip of the river and can be found in three locations. Underneath the railway bridge, by the water’s edge, or descending towards the river from the hill slightly further north.
From the Horse Creek Ambush Camp cross the large stone bridge next to the waterfall. As you continue to walk south you’ll eventually spot a large cave, the entrance strewn with branches and blood. The horde responsible is waiting for you just inside.
Belknap Horde locations in Days Gone
Here’s where all the Belknap Horde locations at a glance:
Belknap Horde locations map
The Horde locations in more detail…
Belknap Horde #1 Location (Shadow Lake Horde)
Enter the Belknap region through the Marion Forks Tunnel or fast travel to the Marion Forks NERO Checkpoint. Once here, you need to drive north towards the large lake situated at the top of the Belknap region map. The horde lives inside a cave at the northmost point of the lake, only venturing out as night falls to drink from the lake.
Belknap Horde #2 Location (Marion Forks Horde)
Locate the town of Marion Forks and then travel directly south from the gas station at the town’s centre. Only a short way down the road you’ll notice a cave on your left-hand side littered with the tell-tale signs (blood, tree branches) of a nearby horde. The horde lives inside the cave.
Belknap Horde #3 Location (Belknap Crater Horde)
From the Marion Forks Horde continue to head south and you’ll come across a series of rocky outcrops and a cave. This location is also south-east of the Belknap Caves Ambush camp if you’re having trouble pinpointing the cave mouth. In the day the horde hibernates inside the cavern here.
Belknap Horde #4 Location (The Lava Arch Horde)
At the centre of Belknap stands a giant mountain which divides the region. On the eastern part of the rockface, you’ll find the Lava Arch, an arched rock formation that hides the entrance to a cave. Enter the cave and follow the roped-off pathway to locate the horde sheltering inside.
Belknap Horde #5 Location (Twin Craters Horde)
Head to the south-eastern corner of the Belknap map just below the town of Crazy Willies. Follow the main track south and head to the outskirts of the region. At the most southern point of this area, you’ll find a cave as well as the horde that lives there.
Belknap Horde #6 Location (Bear Creek Hot Spring Horde)
This horde lives close to the Bear Creek Hot Spring Ambush camp. Exit the ambush camp from the west and drive along the sandy track until you come across a series of caves near a fast running river. The Bear Creek Hot Springs Horde live inside the cave just to the right of the grand waterfall.
Belknap Horde #7 Location (Patjens Lakes Horde)
Exit the Hot Springs camp and drive through the abandoned town until you come to the marble gates. Directly opposite is a large, looming cavemouth. Enter the cave and lure out the horde using the water nearby to slow them down.
Lost Lake Horde locations in Days Gone
Here’s where all the Lost Lake Horde locations at a glance:
Lost Lake Horde locations map
The Horde locations in more detail…
Lost Lake Horde Location #1 (River Flow Farms Horde)
A medium-sized horde lives in the area just north of Iron Mike’s Farm. This horde wanders across both sides of the train tracks either by the cluster of houses to the left of the bales of hay or by the barn that can be seen from Iron Mike’s encampment.
Lost Lake Horde Location #2 (Sherman’s Camp Horde)
Head to Sherman’s camp (situated within the Lost Lake region directly west of Iron Mike’s Farm). The town is also home to an infestation zone that you may or may not have cleared during the main campaign. The horde dwells in a shop on the eastern side of the town, so it’s best to clear the infestation zone before you face them.
Lost Lake Horde #3 Location (Metolius Lava Cave Horde)
Head north from Iron Mike’s encampment towards the forests which separate the Lost Lake region from Cascade Wilderness. You’ll eventually come to the Metolius Caves at the top of a rocky outcrop. In the daytime the horde can be found inside these caves, while at night they may wander down the road to the west, to drink from the lake.
Lost Lake Horde #4 Location (Westfir Horde)
Pinpoint Iron Mike’s encampment and head west from there, driving down the same main road that you may have fought the Metolius horde on. In the day you’re most likely to find this horde near three houses just off the tarmac road, each with a different-coloured roof. At night the horde can be found near the petrol station just before the tunnel leading to the Iron Butte region.
Lost Lake Horde #5 Location (Wapinita Road Horde)
From the Berley Lake Ambush camp travel north until you can see the main road from the top of a small hill. Make your way down the hill and you should see the entrance to a small cave. Enter the cave and drop down into the cavern inside to find the Wapinita horde.
Lost Lake Horde #6 Location (Berley Lake Horde)
The easiest way to locate this horde is by travelling to the Santiam Tunnel Nero Checkpointwhich is at the southern border of the Lost Lake region, near the tunnel where you enter Highway 97. From the NERO camp, head northeast until you come across a cave. Inside you’ll be able to find the last horde in the Lost Lake region.
Crater Lake Horde locations in Days Gone
Here’s where all the Crater Lake Horde locations at a glance:
Crater Lake Horde locations map
The Horde locations in more detail…
Crater Lake Horde #1 Location (Mt. Bailey Horde)
At the northwest section of the Crater Lake map, directly west from the Diamond Lake encampment you’ll be able to find the large Mt. Bailey Horde. Whilst they roam this area at night, you can find them in the day in a cave on the border of the region.
Crater Lake Horde #2 Location (McLeod Ridge Horde)
Northeast of the Diamond Lake camp you’ll be able to find the second horde in the Crater Lake region. You’ll need to head into the mountainous snowy area at the top of the map and keep an eye out for the opening of a cave. Find the horde inside.
Crater Lake Horde #3 Location (Rimview Ranch Horde)
Head to the Volcanic Legacy Scenic Byway Nero Checkpoint, and look at the large body of water. The horde sometimes gathers there to drink. If they’re not there, follow the sandy track south until you come to a cave. They’ll be waiting for you inside.
Highway 97 Horde locations in Days Gone
Here’s where all the Highway 97 Horde locations at a glance:
From the Volcanic Legacy Scenic Byway Nero Checkpoint, head into the mountains in a northeast direction. You’ll have to pass through a winding rocky path to reach the nearby rest stop where you will come face to face with the horde that lives in this area.
Highway 97 Horde #2 Location (Mt. Scott Ski Resort Horde)
Running through the Highway 97 region is a small river which cuts through the middle of the northern section of the map. Head directly east from the Volcanic Legacy Scenic Byway until you come to cross a grand bridge over a waterfall. Immediately turn right and drive around the edge of the rocky outcrop by the waterfall. There’s a large cave at the northmost point that shelters this horde.
Highway 97 Horde #3 Location (Sagebrush Point Horde)
From the large bridge nearest the Mt. Scott Ski Resort, drive to the east until you come across a large cave. Inside this cave, you’ll find one of the bigger hordes so make sure you’re well prepared before you take them on.
Highway 97 Horde #4 Location (Beasley Lake Horde)
Open the Highway 97 map and head to the northeast point of the region. This horde can be pinpointed by travelling east from the Sagebrush Point horde, or northeast from the gas station on the east side of Chemult town. This horde is hiding in a cave there.
Highway 97 Horde #5 Location (Solomon Hill Horde)
From the Aspen Butte Ambush camp, head directly north across the main road, past the tunnel to the Crater Lake region until you spot a looming cavemouth. The cave is just to the left of some train tracks and the Soloman Hill horde live inside.
Highway 97 Horde #6 Location (Chemult Station Horde)
Once you’ve arrived in Chemult town, head towards the abandoned bus station just south of the main street that runs between the buildings. After you pass the bus station a large iron bridge and a couple of abandoned train cars will come into view. The horde is living inside one of the empty carriages.
Highway 97 Horde #7 Location (Chemult Community College Horde)
The Chemult Community College area of Highway 97 is a sports field filled with challenges for Deacon to overcome. There’s an infestation zone near the south end of the field, and a Nero Checkpoint to the north. The horde that lives here are hundreds of freakers strong, they rest in the tents in the middle of the sports field.
Highway 97 Horde #8 Location (Cascade Lakes Rail Line Horde)
From Chemult town cross the river to the north and follow the sandy track until you come across branches and corpses scattered on the road, the horde won’t be far. This horde is one of the smaller ones in this region.
Travel directly west from the Chemult Community College Nero Checkpoint until you come to a large bridge that’s blocked by abandoned cars and trucks. Drop down onto the train tracks below and you’ll see a large house which contains the horde.
From the Chemult Community College head southwest via a sandy track. Shrouded by trees, you’ll come across a series of caves. Check each one for the horde, remembering to keep an eye out for the signs of their nests.
From the Rum Rye Gulch Horde location, continue down the dirt path in a western direction. The next horde is only a short distance from the last one in a cave at the top of a hill, away from the sandy track. You’ll have to ascend the hill to enter this cave.
Directly south from the Chemult Community College and directly east from the Pillette Bridge Nero Checkpoint, you’ll be able to find a horde living on Friendship Ridge. This horde live inside an old empty warehouse there.
Highway 97 #13 Location (Lobert Draw Ridge Horde)
At night, the last horde can be found south of the Pillette Bridge Nero Checkpoint, near the train tracks and empty carriages that have been abandoned there. During the day, the horde takes up residence inside the tunnel right on the western edge of the Highway 97 region.
Days Gone Horde rewards explained
Finding and wiping out all 37 Freaker hordes results in you obtaining the St. John Horde Killer Custom Skin for your motorcycle.
Additionally, each individual horde slain will gain you a chunk of trust for that region as well as a handful of experience points. This makes slaying hordes in Days Gone one of the best ways to collect those final few skills you missed during the main campaign.
Sometimes we include links to online retail stores. If you click on one and make a purchase we may receive a small commission. For more information, go here.
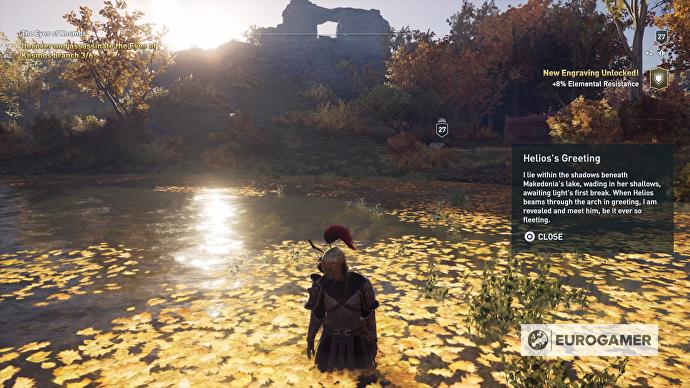
Ainigmata Ostraka are a type of collectible in Assassin’s Creed Odyssey, and are very similar in practice to the Papyrus Puzzles from Assassin’s Creed Origins. Each one contains a riddle on a stone tablet which, when solved, unlocks a new engraving.
Here on this page, we’ll provide you with a full list of all the Ainigmata Ostraka locations, and, of course, how to solve every puzzle to unlock all the engravings.
Assassin’s Creed Odyssey Ainigmata Ostraka explained – puzzle rewards, bonuses and more
Throughout the Ancient Greek world of Assassin’s Creed Odyssey, you’ll come across special collectibles written on stone tablets. These contain a riddle which will lead you to a different location in the same region/island. Solving the riddle will unlock an engraving, which can be added to a piece of armour or weapon to enhance its stats. You’ll need to visit a Blacksmith to apply them.
There are no telltale sound effects or visual cues to make each one stand out. The only element that defines them from the environment around them is a marker that lets you interact once you’re close enough to a respective spot. So they’re really easy to miss!
It is possible to locate all the Ostraka early on, but since all of these items are linked to specific locations – such as hideouts, camps, caves and Leader Houses – there’s a good chance you’ll have to face high-level enemies so it’s a good idea to pick them up along the way or clear the story first so you’re suitably levelled up. Some of the riddles can get really tricky, but don’t worry – we’ve got you covered. Happy hunting!
Rewards and bonuses, and other things to know about Ainigmata Ostraka
There’s really one other key thing to know about Assassin’s Creed Odyssey’s Ainigmata Ostraka, and that’s how their rewards work.
Solving the riddle and finding the hidden treasure of an Ainigmata Ostraka gives you a special Engraving – but contrary to what we originally expected these aren’t set in stone. Instead, there are several set types of Engraving (say, one that gives a percentage increase in Crit Chance on full health), and each time you find an Engraving of that type, its bonus increases.
So, for example, the ostraka called ‘The Floor is Lava’ and ‘Pigsty’ both give you Engravings that increase damage with heavy weapons when solved, but it doesn’t matter what order you solve them in – the first will always increase it by 2%, the second by 4%, up to the fifth, increasing it by 10%.
For reference, here’s a rundown of all the Ainigmata Ostraka according to the Engraving bonus they grant you as a reward, and amount they increase by for each one you solve – but remember, it doesn’t matter what order you do them in!
The easiest Ainigmata Ostraka secrets to find in Ancient Greece:
If you’re out for a few quick hit or just some digestible puzzles to help ease you into the process of hunting them all down, here are some of the easier ones we found:
Hound Docked – Found on a moored ship in the Occupied Forest of Tripodiskos on Megaris.
A Finger Tip – Look for a giant statue led on its back in the Valley of the Snake in Phokis.
Procrastinate Now – Look for the arch-like Portara on Naxos to grab this secret.
Showboat – Head to Patrai and look for a theatre with a boat as its stage in Achaia.
Sometimes we include links to online retail stores. If you click on one and make a purchase we may receive a small commission. For more information, go here.
Sekiro: Shadow’s Die Twice is tough as nails – perhaps From Software’s toughest game to date – requiring some genuine skill and a real shake-up of the tried-and-tested methods you might have used in the Soulsborne games gone by.
Our Sekiro walkthrough and this Sekiro guide hub are here to help though: below we’ll gather each individual guide page we have for the game plus every step of our (currently in-progress) walkthrough, including a Sekiro boss guide and boss list taking you through bosses, mini bosses and any key moments in between.
Sekiro walkthrough – our Sekiro boss guide and boss list
Our walkthrough is still very much in progress for now, as are our standalone guides to the game’s various mechanics – keep checking back for more in the days following launch, but for now here are they key pages we’ve got for you so far:
Sekiro boss list and walkthrough – Ashina Outskirts
Sekiro guide hub – all our Sekiro guides in one place
Like our walkthrough above, our list of Sekiro guides is still growing, and you’ll see plenty more pages spring up here over the coming days and weeks.
Sekiro boss battle advice: key things to know about how to get through Sekiro: Shadow’s Die Twice’s bosses
Our walkthrough above focuses primarily on boss and mini boss fights, and so most of the time it’s all about combat.
With that in mind, here are a handful of key things to know, or just generally bear in mind, when you’re diving into boss fights or working your way through the game. Combine these tips with the specifics we run through in each of our boss pages above, and you’ll be off to a flyer.
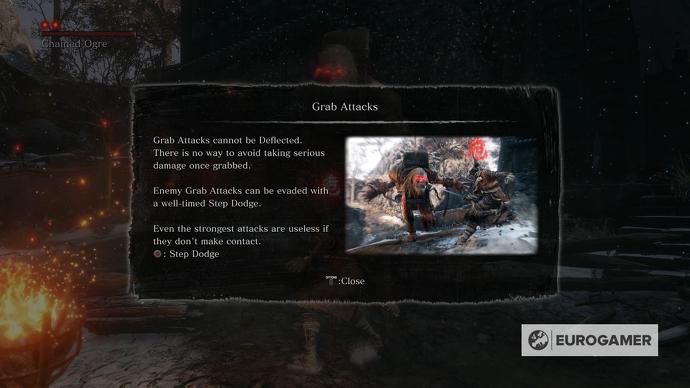
You’ll need to get used to a variety of unblockable attacks and their counters if you want to succeed.
Sekiro boss fight pointers
Bank the next Skill Point – If you know you’re in for a boss or mini boss fight, and there’s a Sculptor’s Idol nearby, it’s worth grinding out a few grunts until you reach the next Skill Point. You lose all your progress to the next point each time you die, so don’t risk all that XP and just get the last few kills to tick yourself over before you take the next big bad on.
Top up on Pellets – There’s a vendor fairly early on, shortly after the second mini boss General Naomori Kawarada (on the far left of the next area, listen for the crow sounds to guide you to him). Use vendors when you see them and don’t be afraid to fast travel back to them before boss fights to top up. A handful of Pellets can make the difference, and that Sen’s got to be spent on something!
Invest your Sen in Light Coin Purses – That said, if you have a load of Sen burnig a hole in your pocket then if you’re not spending it on items, buy Light Coin Purses with it from a vendor. It sounds silly, but these can be ‘activated’ when you need them, and store Sen safely – you don’t lose Light Coin Purses on death, but you do lose half your Sen.
Be more agressive than you’re used to – We cover this more in our Sekiro combat systemguide, but it feels uncomfortable being aggressive in a game that’s so punishing of your mistakes, but it’s necessary. Know your rock-paper-scissors matchups for Perilous Attacks and how to counter them, get a read on your enemy’s roster of attacks and prepare yourself mentally to attack, dodge, jump, and deflect at the right times. There’ll be few major fights where you won’t need to do all of these at some point.
Practice, practice, practice – Don’t ignore that friendly training zombie near the Dilapidated Temple. Every time your learn a new skill or make some significant progress, take the time to visit him and practice it. Set yourself a rule, like “don’t leave until you can finish every new training excercise without taking damage”, and you’ll be amazed at the difference it makes to your combat throughout the game.
Use everything at your disposal, but don’t rely on it – You’ll find that a lot of bosses and general battles can be cheesed. Dousing enemies in Oil and then setting them on fire with a Prosthetic, for instance, or relying on the Firecracker Prosthetic to stun bosses and get some free hits in. These are all worth using, along with the items that are handed out along the way, but don’t rely on them. If you use them as a crutch, you’ll soon hit a boss that’s immune to them, and then without the time spent mastering the foundations of combat, you’ll really struggle.
Over 10 minutes of new Death Stranding footage closed out Geoff Keighley’s Gamescom livestream, with the usual mix of bizarre Hideo Kojima fare.
First, a character trailer for “Mama”, played by The Leftovers actress Margaret Qualley. In this, we discover Qualley’s character is “Mama” to a baby from “the other side”. It’s invisible, so you don’t see it breastfeeding through her clothes.
Next up, a trailer for “Bridge Baby” and “Dead Man”, the latter of which is the character played by Kojima pal Guillermo Del Toro. In this, there’s some heavy exposition for what the babies glimpsed in the game are used for – although after the clip played, Kojima and his interpreter then spent further time laying it all out. Maybe the full game will make more sense.
Lastly, a chunk of actual gameplay footage, where we see main character Sam – AKA Norman Reedus – doing his rounds as a sci-fi Deliveroo driver. He can take a piss and it grows a mushroom. He can also do a job for a character with the face of Geoff Keighley.
After that clip aired, Keighley expressed delight at being included – his face was scanned some time ago, he said. Kojima also made clear you won’t be able to rotate the camera to see Reedus’ penis.