by Stone Marshall | Jul 23, 2018 | Awesome Book News, Free, Intro, Minecraft News, Minecraft questions, news, parent-news, State of Stone, Stone Marshall Book News, Stone Marshall Books, Stone Marshall Club, Stone Marshall Minecraft Adventures, Uncategorized |
Minecraft is a huge game. After each update, Minecraft’s die-hard fans spend endless hours searching high and low throughout the game to find hidden features or glitches which were not publicly announced, or even intended.
There are many hidden “features” in Minecraft, but we have narrowed it down to eight of our favorites – why not give them a try yourself?
8 cool things you probably did not know you could do on Minecraft
1. Torches can be used to destroy sand and gravel en masse
Sometimes, we want to build stuff in the sky. But to get there, you need to first build a pole up into the sky, so you can then build a platform on top of it. Afterward, you’re left with the task of tearing it down, which can be difficult (and dangerous). Thankfully, there is a neat trick you can use to tear down a platform much quicker.
As you may know, sand and gravel in Minecraft are affected by gravity and cannot float in the sky. This means that if there is a tower of gravel or sand and you remove the bottom block, the rest will fall by one. But if you remove the bottom block very quickly and then place a torch in its place, the gravel or sand will cascade down one by one, each being destroyed when it hits the torch, tearing the tower down.
The next time you need to build a tower up into the sky, make it out of sand (or gravel!).
2. Pressure plates can be used to trap water and lava
Two of the most useful – yet most dangerous and irritating – elements of the game, water and lava, like to spread far and wide when they are placed down, and can quickly get out of control. Just tame them with pressure plates – it’s very simple! You can also use signs and fences.
3. Signs can be used to breathe underwater
I’ve lost count of how many times I have died while mining for clay underwater or just forgetting to watch the breath bar. Now I always carry a sign with me when I go under the waves because it lets you stay down as long as you want. All you need to do is to place a sign down against a block while submerged and it will create a pocket of air – easy!
4. Pumpkins make you invisible to Endermen
The Endermen are quite possibly the most irritating mobs in Minecraft. They are absolutely fine until you accidentally look at them, and then they begin to teleport all over the place and intermittently attack you; they are very powerful, and it is an easy mistake to make. However, if you wear a pumpkin on your head (by going to your inventory and placing a pumpkin in your character’s head slot) and look directly at an Enderman, it will not notice and you will be safe from being attacked!
5. The Shining meets Minecraft
In Minecraft 1.11, the Vindicator mob was added, along with an easter egg reference to the Stanley Kubrick movie The Shining. By using a name-tag called “Johnny” to tag the Vindicator mob, it will wield an ax and attack any mob within its radius – this can be very useful at night when you want to save yourself the trouble of taking care of all the zombies and creepers.
Source: https://qph.ec.quoracdn.net
6. Milk a Mooshroom for Mooshroom soup
Just like cows (which can be milked with a glass bottle), the rare Mooshroom cows can be “milked” using a wooden bowl by right-clicking the cow. Mooshroom soup is a very powerful food item and can immediately fill the health and hunger bar. If you can catch one of these Mooshrooms, it can be an unlimited food source!
7. Create an infinite water source
Water is one of the most useful resources in the entire game. It is used for all sorts of gameplay functions – such as brewing potions – and it is very handy to have an unlimited source right at your fingertips, or even in your house. This is very easy to do, and it takes advantage of the game’s water physics, which fills space around a water source block.
Create a 2×2 box and fill each block with a bucket of water. Then when you take some water from it with an empty bucket, the spot from where you took the water from will immediately fill back up and you can do this over and over, and get all of the water you need.
8. Give your tamed dogs a colorful collar
By using one of the many colored dyes available in-game, you can personalize your tamed dog’s collar. Although it’s not such a useful tip, it can be handy to give all of your dogs’ collars different colors so that they can be easily identified, and it looks pretty nice too. To color a collar, just right-click your dog with the dye equipped in your hand.
Read more here: https://en.softonic.com/articles/8-cool-things-you-probably-did-not-know-you-could-do-on-minecraft

by Stone Marshall | Jul 22, 2018 | Awesome Book News, Free, Intro, Minecraft News, Minecraft questions, news, parent-news, State of Stone, Stone Marshall Book News, Stone Marshall Books, Stone Marshall Club, Stone Marshall Minecraft Adventures, Uncategorized |
Minecraft is fast approaching ten years of being one of the world’s most popular games, with hundreds of millions of active players across all platforms. It has revolutionized the industry and has turned some of its most talented players into multi-millionaires. It dominates YouTube, is on the shelves of every toy store, and it even has its own Lego range.
Some people play Minecraft because it offers a lot of creative freedom; Minecraft has been used by architects and in schools as an educational tool. For others, it’s the adventure; such a vast world can be explored endlessly and provides hours of entertainment.
If you’re late to the party and have only just bought the game, you might not know where to start. The game drops you into a very vast world, and it can be a very confusing game to get started with. Each world is randomly generated from a string of numbers (known as a seed), so no two worlds are the same. Fortunately, once you’re armed with a few basics and a pickaxe, you’ll learn the ropes in now time. So let’s dive into the basics.
The 2018 beginner’s guide to Minecraft
Crafting
Crafting is central to the game, and is used to make all kinds of different objects from the materials you have. Each item in the game – such as a sword – has its own individual crafting recipe. For example, to make a stone sword, you would craft it like this:
Placing a stick below two pieces of cobblestone would make a stone sword. Swap out the cobblestone for wood, iron, gold or diamond to create different variations, diamond being the strongest and most durable.
Before you start crafting anything, however, you will need to build a crafting table, which is made from four pieces of wood. This is a very simple process and can be done as soon as you step foot into your first world.
How to build a crafting table
Locate a tree and then punch out some wood by holding down left-click.
Press the e key to open your inventory and select the wood, placing it into the four boxes next to your avatar. Four oak wood planks will appear.
Click the oak wood planks and drag them to your inventory. The original piece of wood will disappear because you have turned it into planks.
Then, fill the four boxes where you placed your original piece of wood with the four wood planks. A crafting table will appear.
Drag the crafting table to your hotbar (the single line of boxes) and then exit your inventory. The crafting table will appear in your hotbar and you can select it by scrolling. When it’s selected (i.e. it is in your hand), place it on the floor by right-clicking.
You now have a crafting table, which is a 9×9 area that allows you to craft anything in the game; just right-click the crafting table to use it.
It is important to know how to utilize the crafting feature so you’re ahead of the game when it comes to surviving your first night in Minecraft, because you won’t have long until it’s dark and monsters spawn. Speaking of which…
The first night
Your first night in the game is the hardest because you start with nothing. When you spawn for the first time, the in-game time is noon. You only have a short amount of time (ten minutes) to get a basic shelter together in order to survive. If you don’t build a basic shelter, you’ll spend your first night repeatedly getting mauled by mobs – not fun!
To survive your first night, you’ll need to grab yourself some wood to build a basic shelter and create some wooden tools, then hunt down some coal to make a couple of torches. Mobs (monsters) spawn in the dark; you really don’t want to create a shelter and then have a monster spawn inside it!
What exactly are “mobs”?
“Mobs” is the term used to describe Minecraft’s animals and monsters. Mobs can either be passive (such as sheep or pigs) or aggressive, and there are many different adversaries in the game that have the potential to harm you or destroy your creations.
Over the years, mobs have been a huge focal point for the Minecraft development team, and the number of mobs has virtually doubled. However, the mobs you should pay special attention to while you’re still finding your feet are the aggressive ones that can spawn in the Overworld.
Zombies are quite easy to fight; you just need to keep hitting them. Zombies will come after you if you get within a certain radius of them, and they can beat down doors. They are very slow and aren’t a huge threat, but a group of them can be deadly.
Spiders only attack you at night. These pesky monsters have the ability to climb walls, jump and move fairly quickly, though, like Zombies, they are quite easy to kill… most of the time.
Skeleton Archers are a serious threat even for experienced players. This very irritating monster carries a bow and arrow and has the ability to shoot you with it. As a result, these monsters can do damage to you from a considerable distance, and they are very accurate.
Creepers are perhaps the most widely known and most destructive of mobs in the game, especially when you are just starting out. Creepers explode when you get within a certain radius of them and can decimate small bases. It takes them a couple of seconds to explode, but they will chase after you, so just stay well away!
Endermen are the final mobs you need to worry about in the early stages of your Minecraft life. These tall, dark, and slender mobs may look pretty scary… because they are. Endermen are passive… until you look at them… and then you’re going to die, probably, because they have the ability to teleport away from and then back to you, attacking from a different angle. Just keep as far away from them as possible; you don’t stand a chance as a new player!
Mining
As you have probably guessed by the name “Minecraft,” mining is pretty much the most important aspect of the game. When you’ve survived your first night, have a basic set of tools, and know which nasty monsters to look out for, you’re set to begin delving underground and exploring the world beneath you.
The world extends down below the grass by around 100-130 blocks; it is here where you will find all the best resources, treasures, and loot. You’ll find iron, diamonds, and gold, with which you can create more durable tools; and redstone, which is Minecraft’s answer to electricity and can be used to make circuits.
Naturally occurring iron ore can be mined with a stone pickaxe and smelted into iron bars.
It is best to start mining below your shelter, because then you are safe from monsters and you don’t need to run through the wilderness to get home and risk being attacked by a monster. Don’t dig straight down, though, or you may fall into lava or a chasm.
The best way to mine is to dig in a stairway pattern; that way you avoid falling into deadly pits and have a clear pathway to get back home. No matter what method you use to mine, though, always make sure you have a plentiful supply of torches and food; it is dark underground, which makes it hard to see and is the perfect environment in which monsters can spawn and ruin your day!
It is easy to get lost in mining, and people often spend many hours doing it… it is quite therapeutic, and Minecraft’s ambient music only adds to this. Remain vigilant at all times, because monsters do spawn underground in pre-existing caves and dungeons… in fact, it can be just as dangerous below ground as it is above ground.
Now that you have the basics of Minecraft down, take your gaming to the next level with our guides to how to install Minecraft mods and how to change skins in Minecraft.
Read more here: https://en.softonic.com/articles/the-2018-beginners-guide-to-minecraft
by Stone Marshall | Jul 22, 2018 | Awesome Book News, Free, Intro, Minecraft News, Minecraft questions, news, parent-news, State of Stone, Stone Marshall Book News, Stone Marshall Books, Stone Marshall Club, Stone Marshall Minecraft Adventures, Uncategorized |
Running your own little Minecraft server can be a very rewarding experience. Over time, you may build up your very own community of loyal players, which has the potential to grow in popularity if you play your cards right and run your server well.
Although it sounds complicated, running your own server isn’t as hard as you’d imagine. You do not need much prior technical knowledge to get going. Just keep in mind, you should know the Minecraft game itself very well if you are going to attempt this!
Running your own server gives you complete creative control, and there are hundreds of modifications out there which extend the multiplayer experience beyond simple, vanilla Minecraft survival; this is what has made Minecraft multiplayer servers so popular among gamers.
How to start your very own Minecraft server
1. Decide on a server theme and then choose a hosting provider
The first step is to decide on a server theme, and there are plenty to choose from: factions, prison, classic survival, and towny, among others. Each gameplay theme brings completely a completely different dynamic to the game, but you probably already have one in mind.
When you’ve settled on a theme, you need to choose a hosting provider. You can set up a server on your computer, but this is not feasible if you want to have a public server online 24/7. In addition, hosting a server on your computer requires a fair amount of technical knowledge, and it is much easier to go with a hosting provider, where setting up a server is as easy as clicking a few buttons. There are plenty of Minecraft hosting providers out there, but let’s use Nitrous Networks – a UK-based company – as an example.
You are free to use any provider, but Nitrous Networks has good ratings and their prices are reasonable.
2. Setting up your server
When you have paid for your server and it has all processed, navigate to your server’s control panel. It will look like this (most hosting providers follow a general layout):
Press Start, and your server console (where all the timestamped messages are) will fire up, preparing your spawn area. This will take around 10 to 20 seconds – you can see it is ready when no new messages appear.
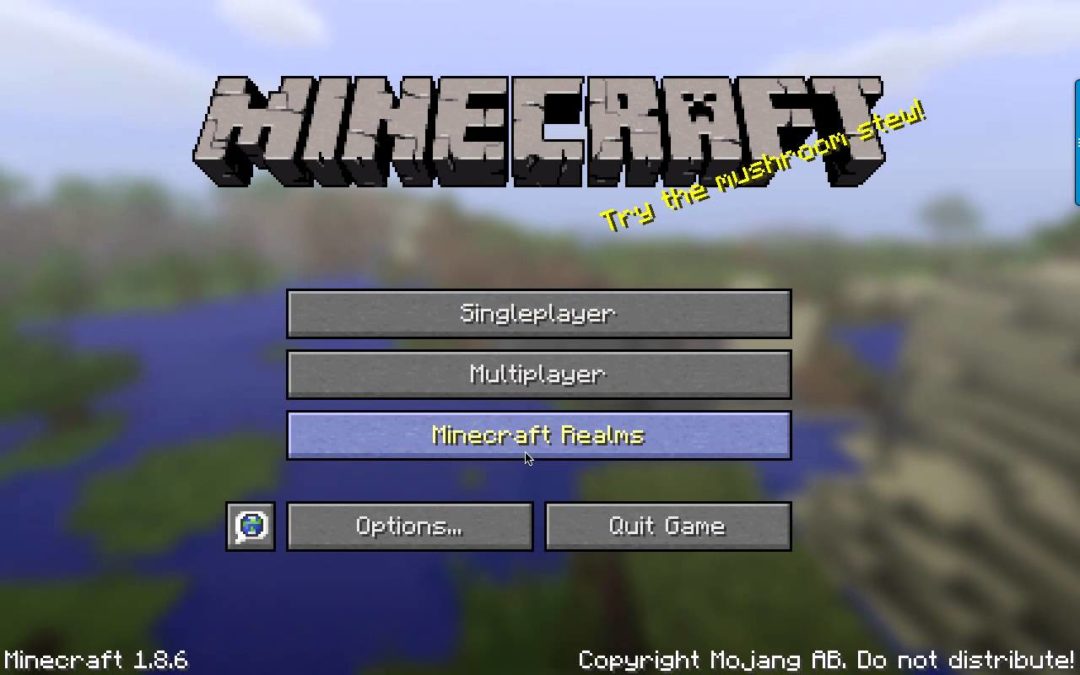
To join your server, navigate to your Minecraft game client and direct connect to your server’s IP address.
That’s it – it really is that simple! Although, your new server will be very plain… it is what is referred to as ‘vanilla Minecraft’, that meaning it is the basic Minecraft game. Although it is possible to run a ‘vanilla’ server, they are not as popular as servers like factions, a player-vs-player game mode.
3. Installing Bukkit or Spigot
We recommend installing a Minecraft developer API mod such as Bukkit or Spigot – the two most popular Minecraft server modifications which provide additional functionality and control to Minecraft servers – allowing you to ‘plug in’ additional Minecraft server modifications (called ‘plugins’, such as Factions or Towny) into your server.
Don’t be intimidated by the jargon, installing these are very simple. In your server’s control panel, navigate to ‘Modpacks’ and choose either Bukkit or Spigot, then press Install. That’s it.
At this stage, it does not make much difference which you choose, but Spigot has additional functionality and is further optimized to support larger servers that pull in hundreds of players.
You do not need to worry too much about what Bukkit or Spigot are; they do very little on their own and are developer tools which expose an API which can be used by developers to add functionality to Minecraft servers. This additional functionality is implemented through plugins (and there are thousands), which can be downloaded freely and added to your server.
4. Making yourself an ‘op’
An ‘op’, short for operator, is an administrator on a Minecraft server. These people have access to additional commands and abilities (for example, such as being able to kick or ban players using /kick or /ban, spawn items using /give, or fly using /fly.)
As a server owner, you will want to make yourself an operator because this is the top-level administrative level you can have on a server. It is recommended that you give operator privileges only to yourself and trusted people because some of the commands can wreak havoc on your server and cause irreparable damage.
To make yourself an op for the first time, navigate to your server control panel and type ‘op [name]’ in the input box, replacing [name] with your Minecraft name.
In future, you can type ‘/op [name]’ within your actual server to make additional people operators. But, for first-time use, it must be done on the console.
5. Installing plugins
Plugins bring your server alive, and there are thousands of them. To get an idea of what plugins are and what they are capable of, we recommend installing some and playing around with them.
With the majority of reputable Minecraft server providers, installing plugins can be done through the control panel. Navigate to ‘Plugins’ and begin reading about some of the different ones available. We are going to install a plugin which displays a message to players who join your server. In the ‘Plugins’ search bar, type ‘welcome message’ and install the very first one.
Press View then Install and wait a few minutes. Then, restart your server by navigating to ‘Manage’ and pressing Restart. Your plugin will now be installed. Before the plugin will work, you will need to configure it. This is very easy, and most plugins have a user-friendly file called ‘config.yml’ which allows you to modify its settings.
To access a plugin’s configuration, navigate to the ‘plugins’ folder under the ‘File Manager’ tab, open the plugin’s unique folder (which is usually the name of the plugin) and then click ‘Edit’ next to ‘config.yml’ and follow the instructions provided by the plugin’s developer. It is very easy, and requires no special knowledge.
6. What next?
There are many possibilities with running a Minecraft server, and the best course of action is to just go with the flow, play around with some plugins and figure everything out as you go – you can only learn to run a server by running one, even if it’s just you who plays it to figure things out!
Some of Minecraft’s bigger servers and server networks pull in thousands of unique players per month, and if you create a community which appeals to the general Minecraft community, you could find yourself building a name for yourself very quickly.
Read more here: https://en.softonic.com/articles/how-to-start-your-very-own-minecraft-server
by Stone Marshall | Jul 21, 2018 | Awesome Book News, Free, Intro, Minecraft News, Minecraft questions, news, parent-news, State of Stone, Stone Marshall Book News, Stone Marshall Books, Stone Marshall Club, Stone Marshall Minecraft Adventures, Uncategorized |
Sometimes you make a username, and realize that it’s not the one you want. For most sites, this is an easy fix, and Minecraft is no exception. Unfortunately, you can’t do it in the Minecraft program. This can cause a bit of confusion for those who are trying to change it quickly. But no need to fret. Below we’ve detailed the steps you have to take to change your name with speed and ease.
Name change rules
Minecraft doesn’t allow you to change your name again within 30 days of you doing it. So keep that in mind when you are thinking of what you want your name to be. This 30-day rule also applies to new accounts, so you won’t be able to change a new account name for 30 days either.
Changing your name
We just verified that this works: The first thing you’ll have to do is go to the Mojang website here. Click “Log in” in the top right corner, and log in using the email attached to your Minecraft account. Once you’ve logged in, you should see your Minecraft account, and your username. Next to your username is the word “Change” in parenthesis. Click this, pick whatever name you want, and then verify the prompt they give you. After that, you should be all set!
by Stone Marshall | Jul 21, 2018 | Awesome Book News, Free, Intro, Minecraft News, Minecraft questions, news, parent-news, State of Stone, Stone Marshall Book News, Stone Marshall Books, Stone Marshall Club, Stone Marshall Minecraft Adventures, Uncategorized |
So, it’s launched on Xbox One, but when is the Minecraft Aquatic update PS4 release date? The patch launched on Xbox One, Windows 10 and mobile in mid-May, and phase two of the update release in July. However, we’re still waiting to hear about an Aquatic update release date for PS4.
The new content allows Minecraft players to dive deep into the ocean. You can discover marine life, such as dolphins and fish. Under the sea, players will find treasure chests in shipwrecks and a range of different biomes, alongside 3,000 new additions.
Watch the trailer.
The good news is that owners of the Minecraft PS4 Edition will be getting Update Aquatic. In a statement made on the official blog, Mojang said:
Arriving a little while after the initial launch, players on PlayStation 4 Edition, PlayStation 3, Xbox 360, PS Vita and Wii U will all receive the Update Aquatic.
Minecraft Aquatic Update PS4 Release Date Still Unknown
So, the launch of the significant new addition to the popular sandbox game has already come and gone on various platforms. Now that phase two of the patch has released, we’d expect that the Minecraft Aquatic Update PS4 won’t be too far behind now.
Read more here: https://www.psu.com/news/when-is-minecraft-aquatic-update-ps4-release-date/
by Stone Marshall | Jul 20, 2018 | Awesome Book News, Free, Intro, Minecraft News, Minecraft questions, news, parent-news, State of Stone, Stone Marshall Book News, Stone Marshall Books, Stone Marshall Club, Stone Marshall Minecraft Adventures, Uncategorized |
Ever wanted to explore Treasure Island or pretend to be Robinson Crusoe? Minecraft is now being used to create an ‘immersive experience’ to engage reluctant readers – we see how it plays out
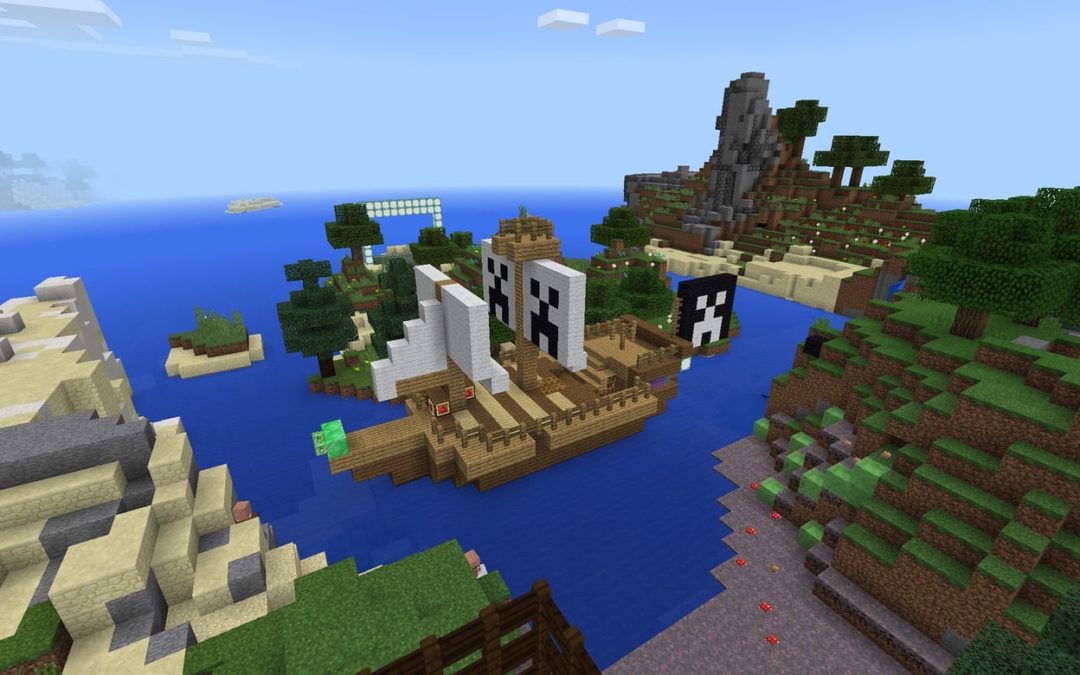
Minecraft of resources … Litcraft’s Treasure Island. Illustration: Lancaster University
Robert Louis Stevenson’s 1881 classic Treasure Island tells of Jim Hawkins’s adventures on board the Hispaniola, as he and his crew – along with double-crossing pirate Long John Silver – set out to find Captain Flint’s missing treasure on Skeleton Island. Now, more than a century later, children can try and find it themselves, with the bays and mountains of Stevenson’s fictional island given a blocky remodelling in Minecraft, as part of a new project aimed at bringing reluctant readers to literary classics.
Sign up for Bookmarks: discover new books our weekly email
From Spyglass Hill to Ben Gunn’s cave, children can explore every nook and cranny of Skeleton Island as part of Litcraft, a new partnership between Lancaster University and Microsoft, which bought the game for $2.5bn (£1.9bn) in 2015 and which is now played by 74 million people each month. The Litcraft platform uses Minecraft to create accurate scale models of fictional islands: Treasure Island is the first, with Michael Morpurgo’s Kensuke’s Kingdom just completed and many others planned.
While regular Minecraft is rife with literary creations – the whole of George RR Martin’s sprawling setting for Game of Thrones, Westeros, has been created in its entirety, as have several different Hogwarts – Litcraft is not all fun and games, being peppered with educational tasks that aim to re-engage reluctant readers with the book it is based on. Lead researcher and head of Lancaster University’s English and creative writing department, Professor Sally Bushell, calls it “an educational model that connects the imaginative spatial experience of reading the text to an immersive experience in the game world”.
An example of Minecraft’s flexibility – users have recreated entire literary worlds, like JK Rowling’s Hogwarts.
She says, of the Litcraft Treasure Island: “We hope it will motivate reluctant readers – we can say, ‘We’re going to read the book and then at one point, we’ll go play on the ship.’ I would have loved it as a kid. It is an empathetic task – you do what the characters did yourself, so you understand why they act they way they did in the book.”
The Treasure Island “level” has been extensively road-tested by children such as Dylan, whose school is set to adopt Litcraft in 2019. “It’s really fun,” he says. “I enjoyed it because I’ve read the book, but you have to follow rules in that. In games, you can explore. Now I know exactly what the book looked like.”
What did he like most? “I like that you get to see the pictures. You don’t have to make them in your head. And I liked the ship, Ben Gunn’s cave and the parrots. And there was that weird pig that kept jumping off that cliff. That wasn’t in the book!” (“That was a game glitch,” says Bushell).
The kids know how to use Minecraft more than the teachers do. It inverts the relationship
Sally Bushell, Lancaster University
The project, which is featured on , is currently being presented to school teachers and librarians across the UK. There has been “an enthusiastic response” to the trials under way in local schools, with plans to roll Litcraft out to libraries in Lancashire and Leeds from October 2018.
Dylan, like many nine-year-olds, enjoys books but is more enthusiastic when talking about Minecraft, which he does with the casual expertise that many children have with their favourite games. He’s already made his own Hunger Games world in Minecraft at home, but couldn’t get some of his traps to work.
This know-how seems to both frighten and impress less tech-savvy adults – which Bushell hopes will not deter schools from adopting it. “The kids know how to do it more than the teachers do,” she says. “It inverts the relationship: you’ve got kids who know more than the adults. You need quite confident teachers. They’re more worried about it. I want to say, ‘Don’t be worried, because all your eight-year-olds will know how to do this.’”
Libraries are particularly interested in the possibilities of multiplayer, Bushell says, adding that one of the future projects will be Lord of the Flies: “In that case, you want all the kids in there playing out a scenario and asking philosophical questions. We hope they do some reading, then play the game, then do some empathetic writing based on what they did in there.”
The Kensuke’s Kingdom map, based on Morpurgo’s story of a boy washed up alone, is particularly aimed at engaging reluctant readers and has just been completed. “The library resources we are putting together include audio and in-game reading and writing as well as graphic novels as a step to the full text,” said Bushell. “The resources are designed to encourage them to either return to or connect with the book through the immersive experience.”
Bushell said more literary Minecraft islands will follow. “Treasure Island is the first world for Minecraft.edu but they anticipate a series – most likely, the next will be The Swiss Family Robinson, The Tempest and Robinson Crusoe,” Bushell says. A recreation of Dante’s Inferno, with a map for each level of hell, is also in development.
But what book does Dylan hope to see next? “The Hunger Games,” he says with no hesitation. “A proper one.”
Read more here: https://www.theguardian.com/books/2018/jul/11/how-minecraft-is-helping-kids-fall-in-love-with-books