Free book for boys and reluctant readers
Flynn’s Log is free on the following devices
Choose your device
KindleiPad/iPod/iPhoneGoogle Play (Android Tablets)nookkoboRead Online
US$8.99 Paperback
Get Reluctant Reader Book News from Stone Marshall
Reading is important
Any book that helps a child to form a habit of reading, to make reading one of his deep and continuing needs, is good for him. –Maya Angelou
Most adults would agree that reading is important, but many kids detest reading. Video games, devices, and TV are preferred entertainment and escape. They provide instant gratification. Reading takes time. For some kids, reading isn’t engaging.
I had this same problem with my son, so I solved the problem.
The classic stories I remember enjoying as a kid don’t interest my son and his immediate attention span. If he doesn’t enjoy the story from page one, he will not read further.

So how did I get my son to read?
I showed him how much fun it is to get sucked into a story.
Your book is amazing I can’t stop reading it – Joseph Young via twitter
Contemporary and Classic titles alike don’t interest many kids. Don’t worry, the love of reading is learned. We need a starting point. We need that one book that is just as engaging on the first read as the fifth, just like a really great movie that kids want to see again and again. A positive association with reading will make kids want to read more.
A love of reading is cited as the number one indicator of future success. My son didn’t have the desire to read. He didn’t care about the books I chose to read to him, and was overwhelmed with the selection at the library. I want my son to succeed, so I had to do something. Since we struggled to find books he cared to read, I wrote one. An epic saga about the things he loves. I put it in a world he loves and addressed the issues he faces in his life.
I just love your books I’ve been reading them over and over again. -Carson via twitter
But it’s a video game book
Don’t worry; it’s not a book about video games, nor is it a game strategy book. Flynn’s Log is a hero’s journey that takes place inside the Minecraft world that today’s kids know and love. The protagonist, Flynn, naturally flows through Maslow’s hierarchy of needs (builds shelter and tools, learns what to eat and discovers a digital friend) and faces questions about his destiny. He learns important life lessons about friendship, integrity, and trust. Flynn’s Log is good for kids without being boring.
Thank you so so much for the free ebook. My son loves Minecraft now with this book I can get him to read to me. – Jennifer Wilkins
Start your son or daughter on journey today, reading Flynn’s Log 1: Rescue Island. Free on available these devices and apps.

Flynn’s Log is free on the following devices
Choose your device
KindleiPad/iPod/iPhoneGoogle Play (Android Tablets)nookkoboRead Online
US$8.99 Paperback
Why is Flynn’s Log 1 Free?
My son loves reading — finally. If you have experience with a reluctant reader then I know your pain and I want to help. I’ve seen thousands of kids transform with this book. My readers, who don’t usually read books during the summer, couldn’t put Flynn’s Log 1 down.
Good book I thought I would never read a book on my summer but I feel I’m gonna finish it soon – Multigamer 47 via twitter
Let this book change your kid’s life too. You have nothing to lose and an avid reader to gain.
Once you learn to read, you will be forever free.
–Frederick Douglas
I am giving away Flynn’s Log 1 free because I want to give you a risk-free way to hook your reluctant reader.
Please and I mean PLEASE, WRITE MORE! I absolutely love it! They’re outstanding books.
-Devon123321 via twitter
What are Books for Boys?
I spend lots of time with teachers and parents. I hear parents ask, “How do I get my son to read? Do you have books for boys?”
I wrote the Flynn’s Log series for my son, and this book is interesting for boys. However, the series is a non-stop read for both boys and girls, especially those who are interested in Minecraft.
The more that you read, the more things you will know. The more that you learn, the more places you’ll go.
—Dr. Seuss
What are you waiting for?
You have nothing to lose!

Flynn’s Log is free on the following devices
Choose your device
KindleiPad/iPod/iPhoneGoogle Play (Android Tablets)nookkoboRead Online
US$8.99 Paperback
News for Parents of Reluctant Readers
Get Reluctant Reader Book News from Stone Marshall
Days Gone Horde locations list, maps and tips to take down a Horde
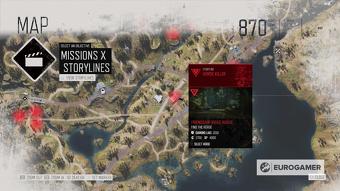
In Days Gone Hordes are huge gatherings of zombie-like Freakers, sometimes hundreds strong – and are perhaps the most daunting thing to come across in the wilderness of post-apocalyptic Oregon.
However, slaying them earns you considerable Days Gone Horde rewards including trust, experience points and, if you can take every single horde out, the St. John Horde Killer Custom Skin for your motorcycle.
On this page:
- How Horde locations work in Days Gone
- Cascade Wilderness Horde locations in Days Gone
- Belknap Horde locations in Days Gone
- Lost Lake Horde locations in Days Gone
- Crater Lake Horde locations in Days Gone
- Highway 97 Horde locations in Days Gone
- Days Gone Horde rewards explained
Looking for more things to tick off your list in Days Gone? Our Days Gone Nero Research Site, Checkpoint and Injector locations page can help.
How Horde locations work and tips to beat Hordes in Days Gone
There are 40 different Freaker hordes spread across five of the game’s six regions. You’ll have to beat three of them during the main campaign, leaving the other 37 roaming the world.
Once the credits have rolled on the main story, every horde will be highlighted on the map.

Your best bet for tackling hordes is strategically planning out each attack. The individual Freakers inside a horde move with great speed towards Deacon, ripping him to pieces if they catch up with him.
Throwable explosives such as frag grenades and molotov cocktails combined with lots of running and machine gun fire is usually the best strategy for killing every individual Freaker in a given horde.
Additionally, Freaker Hordes vary in strength. The further down this list you go, the bigger the hordes tend to be with the Highway 97 region home to the largest and most dangerous hordes.
Cascade Wilderness Horde locations in Days Gone
Here’s where all the Cascade Wilderness Horde locations at a glance:

The Horde locations in more detail…
Cascade Wilderness Horde #1 Location (Grotto Caves Horde)


Locate the Old Pioneer Cemetery Nero Checkpoint at the north-eastern most point of the Cascade Wilderness map. From this checkpoint, head west until you come across a car park situated at the top of a hill. Follow the slope down the other side and you’ll come across the mouth of a cave. The horde emerges from these caves once night falls.
Cascade Wilderness Horde #2 Location (White King Mine Horde)


This horde roams an area at the northwest section of the Cascade Wilderness map, almost directly west from the Grotto Caves Horde and the Jefferson Rail Tunnel Ambush camp. At night the horde can be found in a dry river bed by a small bridge, in the day they sleep in the nearby cave.
Cascade Wilderness Horde #3 Location (Death Train Horde)


Head to the Horse Lake Nero Checkpoint to find this horde. Inside the train carriages that sit abandoned on the tracks just north of the Nero Checkpoint you’ll be able to find a sleeping horde. During the night they wander over to the dig site just east from the NERO trailer.
Cascade Wilderness Horde #4 Location (Horse Lake Horde)


Head northeast on the road from the Horse Lake NERO Checkpoint until you come across a series of cave mouths on the left side of the tarmac. Look for the cave mouth that is adorned with branches and blood, venture inside to find the horde.
Cascade Wilderness Horde #5 Location (O’Leary Mountain Horde)


Locate the O’Leary Mountain Safehouse (it’s the same watchtower that Boozer stays in during the first few hours of the game) and head directly north, heading down the mountain track. The O’Leary Mountain Horde are living in a cave that cuts through the base of the mountain.
Cascade Wilderness Horde #6 Location (Little Bear Lake Horde)


Head to the Little Bear Lake Nero Checkpoint but, before you enter the camp, take the left turn onto the dirt track by the abandoned car and the speed limit sign. Follow this winding track downhill until you come across a wooden shack, during the day the horde hibernate in here.
Cascade Wilderness Horde #7 Location (Cascade Highway Horde)


From the Horse Creek Ambush Camp travel north until you pass underneath the steel railway bridge. This horde moves along the lip of the river and can be found in three locations. Underneath the railway bridge, by the water’s edge, or descending towards the river from the hill slightly further north.
Cascade Wilderness Horde #8 Location (Proxy Falls Horde)


From the Horse Creek Ambush Camp cross the large stone bridge next to the waterfall. As you continue to walk south you’ll eventually spot a large cave, the entrance strewn with branches and blood. The horde responsible is waiting for you just inside.
Belknap Horde locations in Days Gone
Here’s where all the Belknap Horde locations at a glance:

The Horde locations in more detail…
Belknap Horde #1 Location (Shadow Lake Horde)


Enter the Belknap region through the Marion Forks Tunnel or fast travel to the Marion Forks NERO Checkpoint. Once here, you need to drive north towards the large lake situated at the top of the Belknap region map. The horde lives inside a cave at the northmost point of the lake, only venturing out as night falls to drink from the lake.
Belknap Horde #2 Location (Marion Forks Horde)


Locate the town of Marion Forks and then travel directly south from the gas station at the town’s centre. Only a short way down the road you’ll notice a cave on your left-hand side littered with the tell-tale signs (blood, tree branches) of a nearby horde. The horde lives inside the cave.
Belknap Horde #3 Location (Belknap Crater Horde)


From the Marion Forks Horde continue to head south and you’ll come across a series of rocky outcrops and a cave. This location is also south-east of the Belknap Caves Ambush camp if you’re having trouble pinpointing the cave mouth. In the day the horde hibernates inside the cavern here.
Belknap Horde #4 Location (The Lava Arch Horde)


At the centre of Belknap stands a giant mountain which divides the region. On the eastern part of the rockface, you’ll find the Lava Arch, an arched rock formation that hides the entrance to a cave. Enter the cave and follow the roped-off pathway to locate the horde sheltering inside.
Belknap Horde #5 Location (Twin Craters Horde)


Head to the south-eastern corner of the Belknap map just below the town of Crazy Willies. Follow the main track south and head to the outskirts of the region. At the most southern point of this area, you’ll find a cave as well as the horde that lives there.
Belknap Horde #6 Location (Bear Creek Hot Spring Horde)


This horde lives close to the Bear Creek Hot Spring Ambush camp. Exit the ambush camp from the west and drive along the sandy track until you come across a series of caves near a fast running river. The Bear Creek Hot Springs Horde live inside the cave just to the right of the grand waterfall.
Belknap Horde #7 Location (Patjens Lakes Horde)


Exit the Hot Springs camp and drive through the abandoned town until you come to the marble gates. Directly opposite is a large, looming cavemouth. Enter the cave and lure out the horde using the water nearby to slow them down.
Lost Lake Horde locations in Days Gone
Here’s where all the Lost Lake Horde locations at a glance:

The Horde locations in more detail…
Lost Lake Horde Location #1 (River Flow Farms Horde)


A medium-sized horde lives in the area just north of Iron Mike’s Farm. This horde wanders across both sides of the train tracks either by the cluster of houses to the left of the bales of hay or by the barn that can be seen from Iron Mike’s encampment.
Lost Lake Horde Location #2 (Sherman’s Camp Horde)


Head to Sherman’s camp (situated within the Lost Lake region directly west of Iron Mike’s Farm). The town is also home to an infestation zone that you may or may not have cleared during the main campaign. The horde dwells in a shop on the eastern side of the town, so it’s best to clear the infestation zone before you face them.
Lost Lake Horde #3 Location (Metolius Lava Cave Horde)


Head north from Iron Mike’s encampment towards the forests which separate the Lost Lake region from Cascade Wilderness. You’ll eventually come to the Metolius Caves at the top of a rocky outcrop. In the daytime the horde can be found inside these caves, while at night they may wander down the road to the west, to drink from the lake.
Lost Lake Horde #4 Location (Westfir Horde)


Pinpoint Iron Mike’s encampment and head west from there, driving down the same main road that you may have fought the Metolius horde on. In the day you’re most likely to find this horde near three houses just off the tarmac road, each with a different-coloured roof. At night the horde can be found near the petrol station just before the tunnel leading to the Iron Butte region.
Lost Lake Horde #5 Location (Wapinita Road Horde)


From the Berley Lake Ambush camp travel north until you can see the main road from the top of a small hill. Make your way down the hill and you should see the entrance to a small cave. Enter the cave and drop down into the cavern inside to find the Wapinita horde.
Lost Lake Horde #6 Location (Berley Lake Horde)


The easiest way to locate this horde is by travelling to the Santiam Tunnel Nero Checkpointwhich is at the southern border of the Lost Lake region, near the tunnel where you enter Highway 97. From the NERO camp, head northeast until you come across a cave. Inside you’ll be able to find the last horde in the Lost Lake region.
Crater Lake Horde locations in Days Gone
Here’s where all the Crater Lake Horde locations at a glance:

The Horde locations in more detail…
Crater Lake Horde #1 Location (Mt. Bailey Horde)


At the northwest section of the Crater Lake map, directly west from the Diamond Lake encampment you’ll be able to find the large Mt. Bailey Horde. Whilst they roam this area at night, you can find them in the day in a cave on the border of the region.
Crater Lake Horde #2 Location (McLeod Ridge Horde)


Northeast of the Diamond Lake camp you’ll be able to find the second horde in the Crater Lake region. You’ll need to head into the mountainous snowy area at the top of the map and keep an eye out for the opening of a cave. Find the horde inside.
Crater Lake Horde #3 Location (Rimview Ranch Horde)


Head to the Volcanic Legacy Scenic Byway Nero Checkpoint, and look at the large body of water. The horde sometimes gathers there to drink. If they’re not there, follow the sandy track south until you come to a cave. They’ll be waiting for you inside.
Highway 97 Horde locations in Days Gone
Here’s where all the Highway 97 Horde locations at a glance:

The Horde locations in more detail…
Highway 97 Horde #1 Location (Beaver Marsh Rest Stop Horde)


From the Volcanic Legacy Scenic Byway Nero Checkpoint, head into the mountains in a northeast direction. You’ll have to pass through a winding rocky path to reach the nearby rest stop where you will come face to face with the horde that lives in this area.
Highway 97 Horde #2 Location (Mt. Scott Ski Resort Horde)


Running through the Highway 97 region is a small river which cuts through the middle of the northern section of the map. Head directly east from the Volcanic Legacy Scenic Byway until you come to cross a grand bridge over a waterfall. Immediately turn right and drive around the edge of the rocky outcrop by the waterfall. There’s a large cave at the northmost point that shelters this horde.
Highway 97 Horde #3 Location (Sagebrush Point Horde)


From the large bridge nearest the Mt. Scott Ski Resort, drive to the east until you come across a large cave. Inside this cave, you’ll find one of the bigger hordes so make sure you’re well prepared before you take them on.
Highway 97 Horde #4 Location (Beasley Lake Horde)


Open the Highway 97 map and head to the northeast point of the region. This horde can be pinpointed by travelling east from the Sagebrush Point horde, or northeast from the gas station on the east side of Chemult town. This horde is hiding in a cave there.
Highway 97 Horde #5 Location (Solomon Hill Horde)


From the Aspen Butte Ambush camp, head directly north across the main road, past the tunnel to the Crater Lake region until you spot a looming cavemouth. The cave is just to the left of some train tracks and the Soloman Hill horde live inside.
Highway 97 Horde #6 Location (Chemult Station Horde)


Once you’ve arrived in Chemult town, head towards the abandoned bus station just south of the main street that runs between the buildings. After you pass the bus station a large iron bridge and a couple of abandoned train cars will come into view. The horde is living inside one of the empty carriages.
Highway 97 Horde #7 Location (Chemult Community College Horde)


The Chemult Community College area of Highway 97 is a sports field filled with challenges for Deacon to overcome. There’s an infestation zone near the south end of the field, and a Nero Checkpoint to the north. The horde that lives here are hundreds of freakers strong, they rest in the tents in the middle of the sports field.
Highway 97 Horde #8 Location (Cascade Lakes Rail Line Horde)


From Chemult town cross the river to the north and follow the sandy track until you come across branches and corpses scattered on the road, the horde won’t be far. This horde is one of the smaller ones in this region.
Highway 97 Horde #9 Location (Groose Gardens Horde)


Travel directly west from the Chemult Community College Nero Checkpoint until you come to a large bridge that’s blocked by abandoned cars and trucks. Drop down onto the train tracks below and you’ll see a large house which contains the horde.
Highway 97 Horde #10 Location (Rum Rye Gulch Horde)


From the Chemult Community College head southwest via a sandy track. Shrouded by trees, you’ll come across a series of caves. Check each one for the horde, remembering to keep an eye out for the signs of their nests.
Highway 97 Horde #11 Location (Juniper Ridge Horde)


From the Rum Rye Gulch Horde location, continue down the dirt path in a western direction. The next horde is only a short distance from the last one in a cave at the top of a hill, away from the sandy track. You’ll have to ascend the hill to enter this cave.
Highway 97 Horde #12 Location (Friendship Ridge Horde)


Directly south from the Chemult Community College and directly east from the Pillette Bridge Nero Checkpoint, you’ll be able to find a horde living on Friendship Ridge. This horde live inside an old empty warehouse there.
Highway 97 #13 Location (Lobert Draw Ridge Horde)


At night, the last horde can be found south of the Pillette Bridge Nero Checkpoint, near the train tracks and empty carriages that have been abandoned there. During the day, the horde takes up residence inside the tunnel right on the western edge of the Highway 97 region.
Days Gone Horde rewards explained
Finding and wiping out all 37 Freaker hordes results in you obtaining the St. John Horde Killer Custom Skin for your motorcycle.
Additionally, each individual horde slain will gain you a chunk of trust for that region as well as a handful of experience points. This makes slaying hordes in Days Gone one of the best ways to collect those final few skills you missed during the main campaign.

Sometimes we include links to online retail stores. If you click on one and make a purchase we may receive a small commission. For more information, go here.
Assassin’s Creed Odyssey Ainigmata Ostraka locations – how to solve all ancient puzzles
Ainigmata Ostraka are a type of collectible in Assassin’s Creed Odyssey, and are very similar in practice to the Papyrus Puzzles from Assassin’s Creed Origins. Each one contains a riddle on a stone tablet which, when solved, unlocks a new engraving.
Here on this page, we’ll provide you with a full list of all the Ainigmata Ostraka locations, and, of course, how to solve every puzzle to unlock all the engravings.
For more in a similar vein, we have a complete guide to all Assassin’s Creed Odyssey tomb solutions and locations, too!
Assassin’s Creed Odyssey Ainigmata Ostraka explained – puzzle rewards, bonuses and more
Throughout the Ancient Greek world of Assassin’s Creed Odyssey, you’ll come across special collectibles written on stone tablets. These contain a riddle which will lead you to a different location in the same region/island. Solving the riddle will unlock an engraving, which can be added to a piece of armour or weapon to enhance its stats. You’ll need to visit a Blacksmith to apply them.

There are no telltale sound effects or visual cues to make each one stand out. The only element that defines them from the environment around them is a marker that lets you interact once you’re close enough to a respective spot. So they’re really easy to miss!
It is possible to locate all the Ostraka early on, but since all of these items are linked to specific locations – such as hideouts, camps, caves and Leader Houses – there’s a good chance you’ll have to face high-level enemies so it’s a good idea to pick them up along the way or clear the story first so you’re suitably levelled up. Some of the riddles can get really tricky, but don’t worry – we’ve got you covered. Happy hunting!
Rewards and bonuses, and other things to know about Ainigmata Ostraka
There’s really one other key thing to know about Assassin’s Creed Odyssey’s Ainigmata Ostraka, and that’s how their rewards work.
Solving the riddle and finding the hidden treasure of an Ainigmata Ostraka gives you a special Engraving – but contrary to what we originally expected these aren’t set in stone. Instead, there are several set types of Engraving (say, one that gives a percentage increase in Crit Chance on full health), and each time you find an Engraving of that type, its bonus increases.

So, for example, the ostraka called ‘The Floor is Lava’ and ‘Pigsty’ both give you Engravings that increase damage with heavy weapons when solved, but it doesn’t matter what order you solve them in – the first will always increase it by 2%, the second by 4%, up to the fifth, increasing it by 10%.
For reference, here’s a rundown of all the Ainigmata Ostraka according to the Engraving bonus they grant you as a reward, and amount they increase by for each one you solve – but remember, it doesn’t matter what order you do them in!
Assassin’s Creed Odyssey Ainigmata Ostraka rewards list:

Looking for more help? Our main Assassin’s Creed Odyssey guide and tips hub gives you an overview of our pages, while we also have all fifty-plus Ainigmata Ostraka puzzle locations and solutions, plus more on how to get the Assassin’s Creed Odyssey best ending, a list of all Assassin’s Creed Odyssey tomb solutions, the best weapons, armour, engravings, and legendary armour and weapons listed, the Kalydonian Boar strategy and location, Orichalcum locationsand even help with Assassin’s Creed Odyssey romance options. Elsewhere we can help with how to earn money and Drachmae fast in Assassin’s Creed Odyssey, and how to earn XP and level up fast in Assassin’s Creed Odyssey.
Otherwise, in the section below you’ll find our big (in-progress) list of Ainigmata Ostraka locations and their solutions!
Ainigmata Ostraka locations, solutions and puzzles listed
Kephallonia Island Ainigmata Ostraka:
- Bottomless Lake, Ashes to Ashes riddle solutions, Melissani Cave, Markos’s Vineyard tablets
- Fatal Attraction riddle solution, Odysseus’s Palace tablet
Northern Greece Ainigmata Ostraka:
- Pressed for Time, A Finger Tip riddle solutions, Sacred Lands of Apollo, Despina Fort tablets
- A Specific General riddle solution, Sanctuary of Athena Pronaia tablet
- Red Scent, Heart and Sole riddle solutions, Lokris Leader’s House, Phyllidos’s House tablets
Attika Peninsula Ainigmata Ostraka:
- Hound Docked, Happy Hour riddle solutions, Occupied Forest of Tripodiskos, Battlefield Cave tablets
- Record Sunshine riddle solution, Valley of King Lelex tablet
- Backstage Pass, Odor in the Court riddle solutions, Greater Athens Textile Workshop, Ariabignes Shipwreck tablets
- War Eagle, Elbow Greece riddle solutions, Isle of Salamis Marble Quarry, Altar of Love tablets
- Goat’s Gruff, Killer View riddle solutions, Camp Dekelia, Mount Pentelikos Marble Quarry tablets
- Pigsty, Fire in the Belly riddle solutions, Kreusis Military Camp, Tower of Askre tablets
- Stadium Love, Bridging the Gap riddle solutions, Thebes Leader’s House, Cursed Lands of Oedipus tablets
Forest Islands Ainigmata Ostraka:
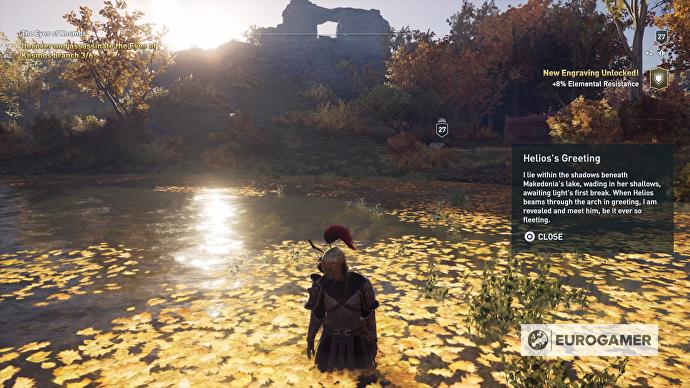
- Helios’s Greeting, Hungry for Misadventure riddle solutions, Amphipolis Leader’s House, Ancient Stronghold tablets
- To the Edge of the World, Dye Dye Dye riddle solutions, Anavatos Ruin, Teichos of Herakles tablets
- A Deal For Freedom riddle solution and where to find the Oreos Quarry tablet
- Star-Crossed Lovers riddle solution and where to find the Alkidas Fort tablet
Paradise Islands Ainigmata Ostraka:
- Blue Eyed Beauty, Smoke Signal riddle solutions, Cradle of Myths, Lion Hill tablets
- Pride of Place, Stone Cold riddle solutions, Wailing Cavern, Korinth tablets
- Estate Envy, Marbled Morale riddle solutions, Mykonos Leader’s House, Porphyrion Cave tablets
- Needle in a Haystack, Grave Discovery riddle solutions, Sunken Wreck of Datis, Kynthos Ruins tablets
- Procrastinate Now, Stubborn Mule riddle solutions and where to find the Naxos Quarry, Cave of Mount Zas tablets
Arid Islands Ainigmata Ostraka:
- Upon Typhon’s Crown, Beneath Theseus’s Dream riddle solutions, Melos Leader’s House, Plains of Achilles tablets
- Made in Abyss, ‘Til Death Do Us Part riddle solutions, Temple of Aphrodite, Temple of Poseidon tablets
Peloponnese Ainigmata Ostraka:
- Turning Tides, An Arm and a Leg riddle solutions, Sea Captain Dock, Argos Leader’s House tablets
- Two of Clubs, The Floor is Lava riddle solutions, Bronze Club of Periphetes, Epidauros Akropolis tablets
- Showboat, Strange Disease riddle solutions, Ruins of Helike, Temple of Apollo tablets
- Hobby Horsing, Farming Coin riddle solution, Lost Horse of Odysseus, Golden Fields tablets
- Sweet Tooth, Foggy Memory riddle solution, Lagos’s Compound, Palace of Aphareus tablets
- Procession of Bones, Tastes like Chicken riddle solutions, Temple of Apollo Korythos, Terror Gorge cave tablets
- Rightful King, Mapping Out riddle solutions, Paidiskoi Camp, Altar of Dioskouri tablets
- Soldier to Shoulder riddle solution, Sparta Leader House tablet
- Prophecy Prevention riddle solution and where to find the Spring of Piera tablet
- Rock and Roll riddle solution and where to find the Diolkos West Ramp tablet
- Belly Flop riddle solution and where to find the Sanctuary of Poseidon tablet
The easiest Ainigmata Ostraka secrets to find in Ancient Greece:
If you’re out for a few quick hit or just some digestible puzzles to help ease you into the process of hunting them all down, here are some of the easier ones we found:
- Hound Docked – Found on a moored ship in the Occupied Forest of Tripodiskos on Megaris.
- A Finger Tip – Look for a giant statue led on its back in the Valley of the Snake in Phokis.
- Procrastinate Now – Look for the arch-like Portara on Naxos to grab this secret.
- Showboat – Head to Patrai and look for a theatre with a boat as its stage in Achaia.
Sometimes we include links to online retail stores. If you click on one and make a purchase we may receive a small commission. For more information, go here.
Sekiro boss guide and walkthrough – boss and mini boss list for beating Sekiro: Shadows Die Twice
Sekiro: Shadow’s Die Twice is tough as nails – perhaps From Software’s toughest game to date – requiring some genuine skill and a real shake-up of the tried-and-tested methods you might have used in the Soulsborne games gone by.
Our Sekiro walkthrough and this Sekiro guide hub are here to help though: below we’ll gather each individual guide page we have for the game plus every step of our (currently in-progress) walkthrough, including a Sekiro boss guide and boss list taking you through bosses, mini bosses and any key moments in between.
On this page:
- Sekiro walkthrough – our Sekiro boss guide and boss list
- Sekiro guide hub – all our Sekiro guides in one place
- Sekiro boss battle advice: key things to know about how to get through Sekiro: Shadow’s Die Twice’s bosses
Sekiro walkthrough – our Sekiro boss guide and boss list
Our walkthrough is still very much in progress for now, as are our standalone guides to the game’s various mechanics – keep checking back for more in the days following launch, but for now here are they key pages we’ve got for you so far:
Sekiro boss list and walkthrough – Ashina Outskirts
- Sekiro Leader Shigenori Yamauchi fight – how to beat and kill Yamauchi
- Sekiro General Naomori Kawarada fight – how to beat and kill Kawarada
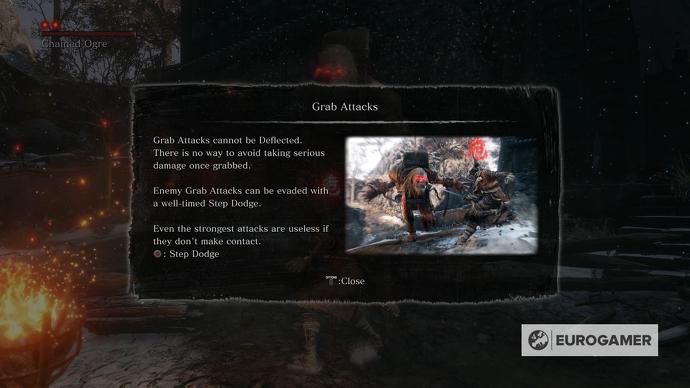
- Sekiro Chained Ogre fight – how to beat and kill the Ogre with fire
- Sekiro General Tenzen Yamauchi fight – how to beat and kill General Tenzen
Sekiro boss list and walkthrough – Hirata Estate
- Sekiro Shinobi Hunter Enshin of Misen fight – how to beat and kill the Shinobi Hunter
- Sekiro Juzou the Drunkard fight – how to beat and kill the Drunkard
- Sekiro Lady Butterfly fight – how to beat and kill Lady Butterfly
Sekiro boss list and walkthrough – Ashina Castle
- Sekiro Gyoubu Oniwa fight – how to beat and kill the horse boss Gyoubu
- Sekiro Blazing Bull fight – how to beat and kill the Blazing Bull
- Sekiro General Kuranosuke Matsumoto mini fight – how to beat and kill General Matsumoto
- Sekiro Ashina Elite Jinsuke Saze fight – how to beat and kill the Ashina Elite
- Sekiro Seven Ashina Spears fight – how to beat and kill Seven Ashina Spears Shikibu Toshikatsu Yamauchi
- Sekiro Lone Shadow Longswordsman fight – how to beat and kill the Lone Shadow Longswordsman
- Sekiro Genichiro Ashina fight – how to beat and kill Genichiro Ashina Way of Tomoe
Sekiro boss list and walkthrough – Senpou Temple
- Sekiro Armored Warrior fight – how to beat and kill the Armored Warrior
- Sekiro Long-arm Centipede Sen’un fight – how to beat and kill the first Long-arm Centipede, Sen’un
- Sekiro Folding Screen Monkeys fight – how to find and kill all four Folding Screen Monkeys
Sekiro boss list and walkthrough – Ashina Depths
- Sekiro Snake Eyes Shirahagi fight – how to beat and kill the first Snake Eyes, Shirahagi
- Sekiro O’rin of the Water fight – how to beat and kill O’rin of the Water
- Sekiro Corrupted Monk fight – how to beat and kill the first Corrupted Monk
Sekiro boss list and walkthrough – Sunken Valley
Sekiro boss list and walkthrough – Return of Ashina Castle
- Sekiro Great Shinobi Owl fight – how to beat and kill the Owl
- Sekiro Emma and Isshin Ashina fight – how to beat and kill Emma and Isshin Ashina
Sekiro boss list and walktrhough – Fountainhead Palace
- Sekiro True Corrupted Monk fight – how to beat and kill the Fountainhead Corrupted Monk
- Sekiro Divine Dragon fight – how to beat and kill the Divine Dragon
The final Sekiro boss
Sekiro guide hub – all our Sekiro guides in one place
Like our walkthrough above, our list of Sekiro guides is still growing, and you’ll see plenty more pages spring up here over the coming days and weeks.
Here’s what we have for now.
Sekiro guides – systems and tips
- Sekiro tips and tricks for beginners and returning experts
- Sekiro Skills explained – Skill tree, best Skills, how to grind Skill Points, find Esoteric Texts
- Sekiro combat system explained – Posture, Perilous Attacks and how to Deflect
- Sekiro Dragonrot cure explained – how to cure Dragonrot, Rot Essence’s effect on NPCs
- Sekiro ending steps: Best ending Return, Purification ending, plus Shura and Immortal Severance explained
Sekiro guides – collectibles and locations
- Sekiro Treasure Carp Scale locations – where to find all Treasure Carp Scales
- Sekiro Prayer Beads location list – all Prayer Bead locations and where to find them
- Sekiro Divine Confetti farm route, method and locations – how to get Divine Confetti easily
- Sekiro Snap Seed locations – all Snap Seeds and how to find and use them
- Sekiro Prosthetic Tool locations – all Shinobi Prosthetics including Firecracker, Sabimaru, Umbrella
Sekiro boss battle advice: key things to know about how to get through Sekiro: Shadow’s Die Twice’s bosses
Our walkthrough above focuses primarily on boss and mini boss fights, and so most of the time it’s all about combat.
With that in mind, here are a handful of key things to know, or just generally bear in mind, when you’re diving into boss fights or working your way through the game. Combine these tips with the specifics we run through in each of our boss pages above, and you’ll be off to a flyer.

Sekiro boss fight pointers
- Bank the next Skill Point – If you know you’re in for a boss or mini boss fight, and there’s a Sculptor’s Idol nearby, it’s worth grinding out a few grunts until you reach the next Skill Point. You lose all your progress to the next point each time you die, so don’t risk all that XP and just get the last few kills to tick yourself over before you take the next big bad on.
- Top up on Pellets – There’s a vendor fairly early on, shortly after the second mini boss General Naomori Kawarada (on the far left of the next area, listen for the crow sounds to guide you to him). Use vendors when you see them and don’t be afraid to fast travel back to them before boss fights to top up. A handful of Pellets can make the difference, and that Sen’s got to be spent on something!
- Invest your Sen in Light Coin Purses – That said, if you have a load of Sen burnig a hole in your pocket then if you’re not spending it on items, buy Light Coin Purses with it from a vendor. It sounds silly, but these can be ‘activated’ when you need them, and store Sen safely – you don’t lose Light Coin Purses on death, but you do lose half your Sen.
- Be more agressive than you’re used to – We cover this more in our Sekiro combat systemguide, but it feels uncomfortable being aggressive in a game that’s so punishing of your mistakes, but it’s necessary. Know your rock-paper-scissors matchups for Perilous Attacks and how to counter them, get a read on your enemy’s roster of attacks and prepare yourself mentally to attack, dodge, jump, and deflect at the right times. There’ll be few major fights where you won’t need to do all of these at some point.
- Practice, practice, practice – Don’t ignore that friendly training zombie near the Dilapidated Temple. Every time your learn a new skill or make some significant progress, take the time to visit him and practice it. Set yourself a rule, like “don’t leave until you can finish every new training excercise without taking damage”, and you’ll be amazed at the difference it makes to your combat throughout the game.
- Use everything at your disposal, but don’t rely on it – You’ll find that a lot of bosses and general battles can be cheesed. Dousing enemies in Oil and then setting them on fire with a Prosthetic, for instance, or relying on the Firecracker Prosthetic to stun bosses and get some free hits in. These are all worth using, along with the items that are handed out along the way, but don’t rely on them. If you use them as a crutch, you’ll soon hit a boss that’s immune to them, and then without the time spent mastering the foundations of combat, you’ll really struggle.
Death Stranding gameplay footage shows urination, invisible breastfeeding, Geoff Keighley
Over 10 minutes of new Death Stranding footage closed out Geoff Keighley’s Gamescom livestream, with the usual mix of bizarre Hideo Kojima fare.
First, a character trailer for “Mama”, played by The Leftovers actress Margaret Qualley. In this, we discover Qualley’s character is “Mama” to a baby from “the other side”. It’s invisible, so you don’t see it breastfeeding through her clothes.

Next up, a trailer for “Bridge Baby” and “Dead Man”, the latter of which is the character played by Kojima pal Guillermo Del Toro. In this, there’s some heavy exposition for what the babies glimpsed in the game are used for – although after the clip played, Kojima and his interpreter then spent further time laying it all out. Maybe the full game will make more sense.

Lastly, a chunk of actual gameplay footage, where we see main character Sam – AKA Norman Reedus – doing his rounds as a sci-fi Deliveroo driver. He can take a piss and it grows a mushroom. He can also do a job for a character with the face of Geoff Keighley.
After that clip aired, Keighley expressed delight at being included – his face was scanned some time ago, he said. Kojima also made clear you won’t be able to rotate the camera to see Reedus’ penis.

Death Stranding launches 8th November on PS4, and sometime thereafter on PC.
As Legacy of Kain: Soul Reaver turns 20, let’s remember why it was brilliant
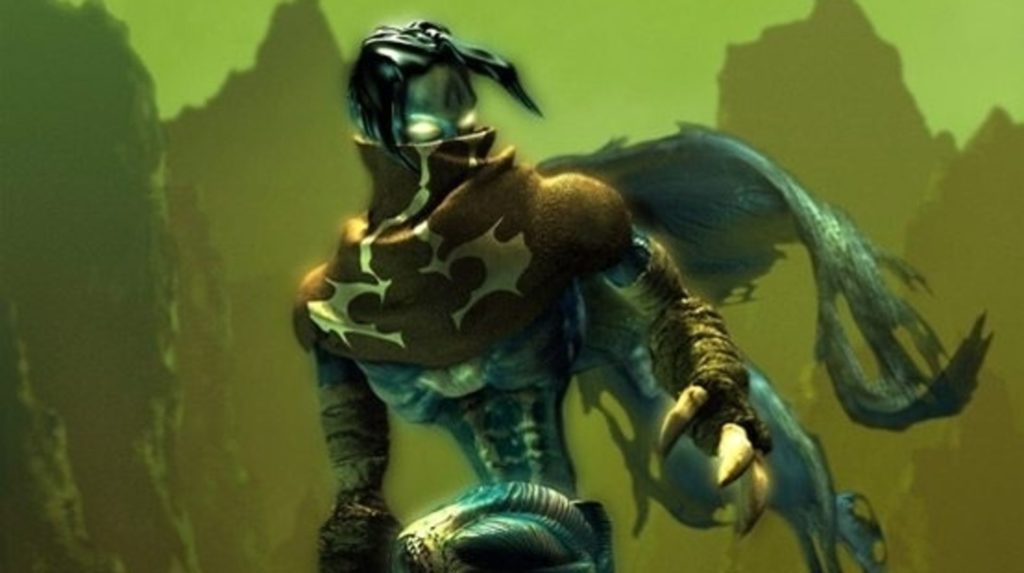
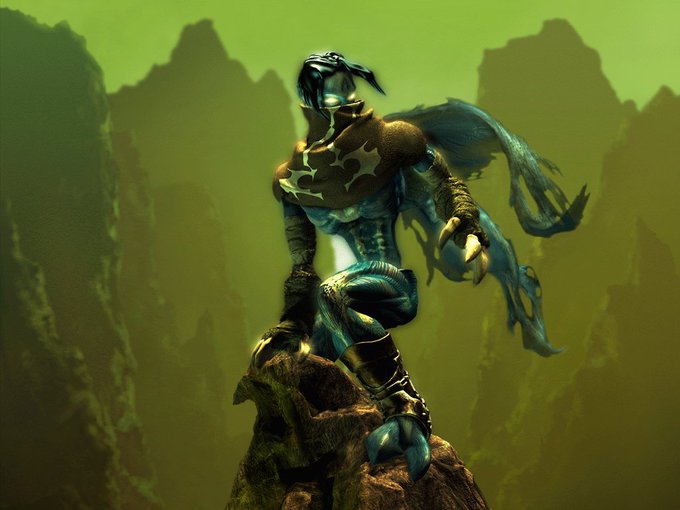
Legacy of Kain: Soul Reaver turned 20 years old on the 16th August 2019.
Crystal Dynamics’ influential PSone, PC and, later, Dreamcast classic was one of the best single-player adventure games on Sony’s console, and is credited with influencing the genre and its subsequent standouts, such as Uncharted.
Legacy of Kain: Soul Reaver was praised for its story, characters, world design, evocative atmosphere and the mechanic of shifting between two world states, which at the time was hugely impressive.
Legacy of Kain: Soul Reaver was directed and written by Amy Hennig, who took to Twitter to say it “holds a very special place in my heart”. Hennig, of course, would go on to play a key role in the Uncharted series at Naughty Dog.

Can’t believe it’s been 20 years since we launched Legacy of Kain: Soul Reaver. This game holds a very special place in my heart.
13.3K1:49 AM – Aug 17, 2019Twitter Ads info and privacy3,483 people are talking about this
Back in 2012, Hennig talked Soul Reaver secrets in a post on the PlayStation blog. Initially, Hennig revealed, Soul Reaver wasn’t supposed to be a sequel to Blood Omen: Legacy of Kain, rather a new IP called Shifter that was loosely inspired by Paradise lost.
“The protagonist was essentially a fallen angel of death, a reaper of souls hunted by his former brethren, and now driven to expose and destroy the false god they all served,” Hennig said.
The Shifter concept was “the genesis” of Soul Reaver. “… the core ideas were all there. The hero was an undead creature, able to shift between the spectral and material realms, and glide on the tattered remains of his wing-like coattails. We conceived the spirit realm as a twisted, expressionistic version of the physical world. The hero was bent on revenge after being betrayed and cast down by his creator – like Raziel, he was a dark savior figure, chosen to restore balance to a blighted, dystopian world.
“When we were asked to adapt this concept into a sequel to Blood Omen, our challenge was to take all these ideas and merge them creatively into the Legacy of Kain mythos.”
Hennig and the development team pared back on some secondary features during the making of Soul Reaver, including a plan to include shape-shifting as well as plane-shifting. The biggest challenge, “hands-down”, was getting the data-streaming working to allow the game to have a seamless, interconnected world with no load events.
“I think we were one of the first developers to tackle this problem (along with Naughty Dog, on Crash Bandicoot),” Hennig said.
“It proved to be way more difficult than we had initially anticipated – if I recall, we were still struggling to get the textures to dynamically pack correctly, just a couple months before release. We ultimately got it working by the skin of our teeth, but I wonder if we would’ve embarked on such an ambitious plan if we’d known how difficult it was going to be!”
As you’d expect, implementing the real-time morph between the two environments – that is, figuring out how to store two sets of data for the spectral and material realms – was also a challenge.
But the “ultimate challenge”, Hennig said, was schedule and scope – a common challenge in video game development.
“Conceived as an open-world, Zelda-esque 3D adventure game, Soul Reaver was incredibly ambitious,” Hennig said.
“Crystal Dynamics’ Gex engine gave us a leg-up on the 3D technology, but in essence we were writing a game engine from scratch, while developing a new IP. These days, a developer wouldn’t think of attempting such a thing in less than three years (minimum), but Eidos wanted the game in less than two. In the end, we shipped Soul Reaver in under 2.5 years, but not without some unfortunate 11th-hour cuts which still pain me today. The scope of the game was definitely too ambitious, but if we had shipped the game that fall, instead of that summer, I think we could have reduced the scope of the game more elegantly.”

To hit the August 1999 release date, the developers had to cut the last few levels of the game, and end on a cliffhanger to set up Soul Reaver 2.
“Originally, Raziel was going to hunt down and destroy all of his former brothers as well as Kain – and then, using his newly-acquired abilities, he would’ve activated the long-dormant pipes of the Silenced Cathedral to wipe out the remaining vampires of Nosgoth with a sonic blast,” Hennig said.
“Only then would he realise he’d been the Elder God’s pawn all along, that the purging of the vampires had devastating consequences, and that the only way to set things right would be to use Moebius’ time-streaming device to go back in time and alter history (in the sequel).
“So the story would have arrived at a similar place, just by a different route. In the end, as much as I hated its bluntness, Soul Reaver’s ‘To Be Continued’ ending probably turned out to be a blessing in disguise, because I think it opened up more interesting story options for the sequels.”
And sequels came. Soul Reaver 2 launched on PS2 and PC in October 2001, Blood Omen 2, which was directed by Dead Space co-creator Glen Schofield, came out just a year later in 2002 as a sequel to the first game in the series, before Hennig returned to direct 2003’s Legacy of Kain: Defiance.
Since then, Legacy of Kain has remained dormant. The ill-fated Nosgoth, a free-to-play multiplayer action game developed by Rocket League maker Psyonix, didn’t make it out of open beta. Legacy of Kain: Dead Sun was a more traditional Legacy of Kain game, developed by Climax Studios for Square Enix Europe, but it was cancelled in 2012 after three years of work. (For the inside story on Legacy of Kain: Dead Sun’s demise, check out our in-depth report.)
So, 20 years after Legacy of Kain: Soul Reaver came out, it remains for many fans the best game in the series. And with no new Legacy of Kain in sight, perhaps it’ll stay that way for years to come.
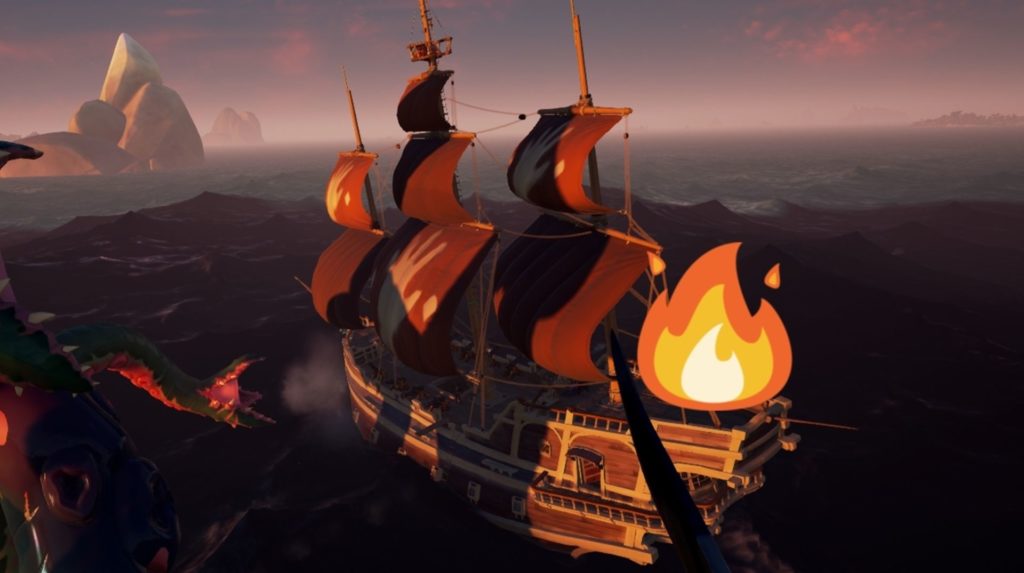
Rare unofficially announces fire for Sea of Thieves
During the latest Sea of Thieves weekly stream, a Rare developer accidentally mentioned fire will make its way to the game.
This isn’t the first time James Thomas, lead engineer at Rare, has inadvertently let some secret info slip. Back on a stream in January he revealed parrots were a pet coming to Sea of Thieves, leading to a six month ban from the weekly streams.
“Somehow the parrots have learned to be aquatic,” he said while discussing how the team had designed pets not to follow you into the water. This is quickly followed by a quiet “parrots confirmed” from Joe Neate, executive producer at Rare.
This week, about an hour and four minutes into his first stream back after the ban, Thomas cheerfully begins to tease the fire mechanic, which players hadn’t actually been told about yet.
“I think the biggest thing we’ve announced that we have coming soon is fire, so hopefully there’ll be something for you-” James starts, before quickly being interrupted by co-streamer Andrew Preston, senior designer for the game.
Rare seems to be taking the accidental reveal pretty well though, taking to Twitter to do some not-so-subtle teasing:

James Thomas@BIGsheep · Aug 21, 2019
*walks away from the Internet*

Joe “Three Sheets” Neate@JoeNeate1

873:23 AM – Aug 21, 2019Twitter Ads info and privacySee Joe “Three Sheets” Neate’s other Tweets

James Thomas@BIGsheep · Aug 21, 2019
*walks away from the Internet*


233:06 AM – Aug 21, 2019Twitter Ads info and privacySee Drew Stevens’s other Tweets

Subtle, folks. Subtle. https://twitter.com/SeaOfThieves/status/1164146739835785216 …Sea of Thieves✔@SeaOfThievesYesterday’s Sea of Thieves Weekly Stream was a hot one, so if you couldn’t catch it live but want to blaze through it looking for new details from the devs – although we’re sure nothing would have leaked out in casual conflagration – you can find it here: https://www.youtube.com/watch?v=qGhOheo7HgE …1378:35 PM – Aug 21, 2019Twitter Ads info and privacy20 people are talking about this
As for this newly teased fire mechanic itself, we don’t actually know anything yet short of the fact it exists. Seeing as pets were announced quite a while ago now and still haven’t appeared in the game, it’ll likely be a little while before we’re able to set anything ablaze in Sea of Thieves.
We hope James Thomas isn’t feeling too burnt up about his mistake, and that Rare lets him off for his accidental act of pyrocy.
Hades heads to Steam Early Access later this year
Supergiant Games’ roguelike dungeon crawler Hades will soon be available on Steam (as well as the Epic Games Store) when it hits early access on Valve’s platform on 10th December.
The developer made the announcement as part of the celebration of its 10th birthday, also revealing the entire catalogue of Supergiant Games are up to 80 per cent off in its anniversary sale on Steam.

Supergiant Games PAX West✔@SupergiantGames · 20h

(1/6) Guess what? Supergiant Games is turning 10 years old!! It’s like we’re a Kid again. Here’s a brief thread with FOUR exciting announcements to mark the occasion!


Supergiant Games PAX West✔@SupergiantGames

(2/6) We’re really excited to announce that we’re bringing #HADES, our rogue-like dungeon crawler, to Steam Early Access on December 10!
It’d mean a lot if you added the game to your wishlist:https://store.steampowered.com/app/1145360/Hades/ …
For more info, visit our official web site.

7391:20 AM – Aug 23, 2019Twitter Ads info and privacy211 people are talking about this
Hades has received a bunch of early access updates on the Epic Store over the last few months, the most recent of which allowing you to pet the giant hell dog.
The game was one of the very first to be an exclusive to Epic’s launcher, and is likely to see its full release in the second half of 2020.
If you can’t wait until the Steam release however, now is a great time to buy Hades as it’s currently 15 per cent off in the Epic Store.
Minecraft’s latest Java update adds bees, hives and honey
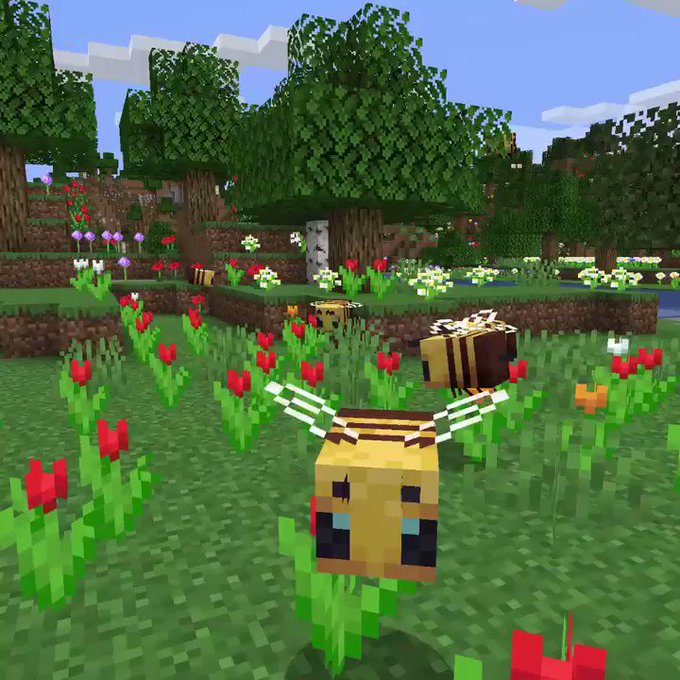
The latest Minecraft Java edition update is chock full of bugs – bees!
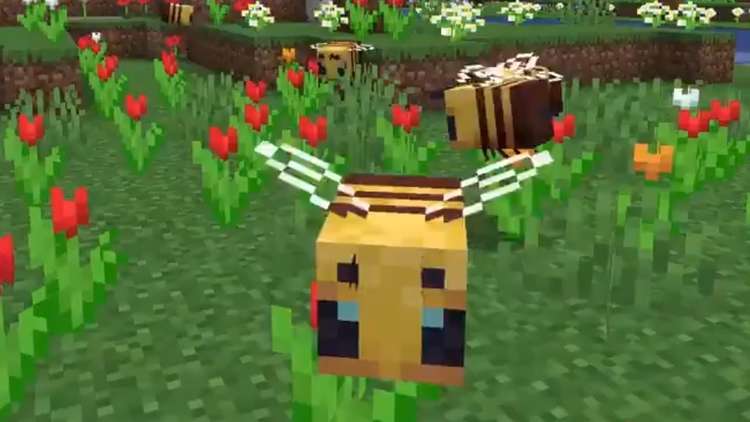
Bees are a brand new neutral mob that will quite happily bumble around, gathering pollen from their favourite flowers and flying back home to their nests to make honey.
They won’t hurt you unless you hurt them – but if you do hurt the bees and provoke them into stinging you they’ll leave their stinger behind and die, and won’t even drop any items for your trouble. You monster.
Bee Nests naturally spawn in Flower Forests, Plains and Sunflower Plains biomes. They have favourite flowers (aww) and like sharing the location of their favourites with other bees (AWW). Do not just whack a bee nest to try and collect the block though! You’ll need to use a tool with silk touch to safely get the block with the bees stored inside, otherwise the nest will be destroyed.
During the nighttime or if it’s raining, your bee pals will chill in their nests. If you want to keep them in chill-mode during the day, you can place a campfire under the nest or hive.
These new mobs will help with your farming by pollinating your crops when they’re on the way back to their nests. You’ll also be able to build a beehive to have your very own colony right on your doorstep, allowing you to harvest their honey and keep them nice and close to your farm.
There are five levels of honey (the amount contained in the nest), and once it reaches level five you’re able to harvest it using an empty glass bottle. You can also harvest honeycomb by shearing a full-honey hive or nest, and you’ll need the honeycomb if you want to create an artificial hive to house your bee friends.

Today, Java Snapshots return, with an exciting new bug! Wait, come back, it’s not that type of bug! Meet Minecraft’s latest mob: the bee!
↣ http://redsto.ne/bees ↢
116K11:37 PM – Aug 22, 2019Twitter Ads info and privacy33.6K people are talking about this
If you haven’t played Minecraft in a while, now is a wonderful time to jump back in. As well as the addition of bees, the game has received plenty of updates, and has even gained official ray tracing support on PC.
You can check out all the details for the latest update on the Minecraft website. There’s no word just yet when bees will migrate over to the game’s cross-platform Bedrock edition.
Minecraft Is About To Look Much Better On PC
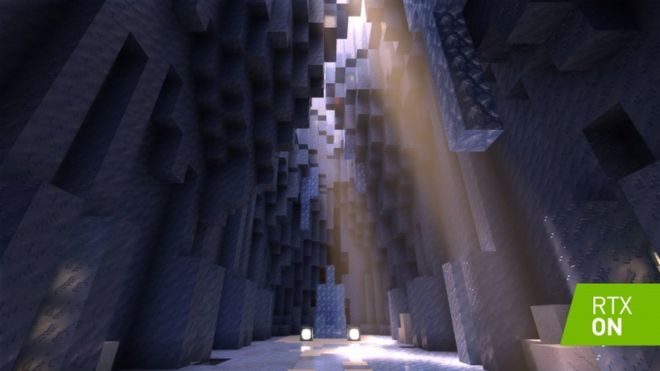
It turns out that Minecraft is getting a visual update after all, just not the one that was originally promised. Overnight, graphics card makers Nvidia announced a new update for the game that will add Minecraft to the growing list of PC games that support real-time ray tracing.
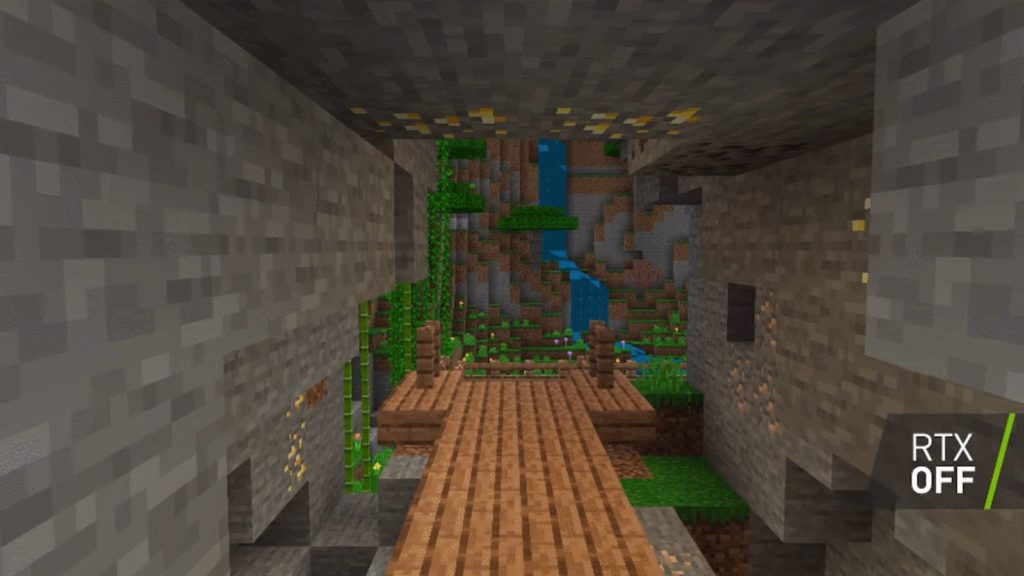
“Ray tracing is one of the key innovations that we think is next for Minecraft,” said Saxs Persson, the game’s creative director, in a video announcing Nvidia’s update. “In normal Minecraft a block of gold just appears yellow but with ray tracing turned on you really get to see the specular highlight, you get to see the reflection, you can even see a mob reflected in it.”
In a brief trailer, you can see how much more vibrant and organic Minecraft’s world feels. Lava glows against nearby blocks, streams of water shimmer and show reflections of what’s nearby, and sunlight filters through a series of vines to create a soft, warm glow on the ground. Of course, players will need Nvidia RTX graphics card if they want to see any of this in their own version of the game.

While Nvidia has also announced that ray tracing support is coming to a bunch of upcoming games including Control and Watch Dogs: Legion, Minecraft is interesting because the game was originally due for a much broader graphical update called the Super Duper Graphics Pack. Announced at E3 2017, the pack was supposed to add much more detailed and realistic lighting effects to the game, as well as other enhancements, including support for 4K.
It was also supposed to be coming to more than just PC, but earlier this month Mojang announced that the Super Duper Graphics Pack had been canceled as it “proved too technically demanding to implement as planned.” The ray tracing update is due out soon.
Minecraft graphics to be more ‘realistic’
Days after cancelling a long-delayed graphics update for Minecraft, Microsoft has unveiled a separate boost for the block-based game’s visuals.
The update improves the way light bounces around game scenes to make Minecraft environments look more “realistic”.
However, the graphics patch will only be available to people with an Nvidia RTX graphics card.
Microsoft said it would be released in 2020 but gave no firm date.
Hefty price
The RTX graphics cards use a technique called “ray tracing” to do a much better job of working out how light bounces around the virtual scenes in games.
It can make on-screen visuals look more realistic as shadows, colours and the play of light in game environments will look more like the real thing.
“Ray tracing sits at the centre of what we think is next for Minecraft,” said Saxs Persson, creative director of Minecraft at Microsoft, in a statement.
“In normal Minecraft, a block of gold just appears yellow, but with ray tracing turned on, you really get to see the specular highlight, you get to see the reflection, you can even see a mob reflected in it,” he said.
Writing on the Rock Paper Shotgun game news website, Katharine Castle said the update looked “impressive in action”.
She added: “I do have concerns over how easy Minecraft’s RTX update will be to run.”
Ms Castle said it would take a “hefty” RTX card to run all the different lighting, shadow and atmospheric effects at the same time.
- Minecraft ditches Super Duper graphics plan
- Minecraft: 10 years on, what’s next?
- Minecraft player loses five-year-long game
The prices of Nvidia cards vary widely across online retailers, but low-end cards typically cost more than £300, The most expensive in the range can cost thousands. The update will also only be available on Windows 10.
As the update is being developed, Minecraft-maker Mojang said it would be added as an option on the settings screen so players could test it out.
It also added that it was working on a more general overhaul of Minecraft’s graphics engine. This, it said, should bring some visual improvements to people who do not possess an RTX card or who do not run the game on a PC.
“Not all devices will support ray tracing, but we will have some graphics enhancements on most devices,” said Mojang. No date has been given for when this general update will be available.
Both announcements were made on the eve of the Gamescom gaming show, which runs this week in Cologne.
News about the RTX release came less than a week after Microsoft announced it was cancelling what it called the “Super Duper Graphics” update for Minecraft.
Announced in 2017, this promised to improve the look of the game on every gadget on which the game was available.
The update was cancelled after two years of development, because the “technical challenges” of producing it had proved insurmountable.
